Thursday, May 24, 2012

Why I Hate the iPhone

I couldn't resist posting a title like that.  Did it bring you in?  Do you have an iPhone?  I don't, but I have a Blackberry and love it. 


So why the negative title...with the word "hate"?


I suppose I don't technically HATE the iPhone.  In the hands of a teenage girl, however, the iPhone completely consumes.... and the eyes are always cast DOWNWARDS, checking for texts, typing texts and playing games, searching for apps, using apps....the list is endless.


No, the list doesn't end there, most definitely not.  Because what my teenage daughter LOVES about her iPhone is the camera. 


Move over Ali Edwards....teenage girls all over the world have far bypassed Project 365 and turned it into Project 3650!!


I suddenly realized this during our Spring Break holiday when I discovered that DramaQueen takes photos of everything and anything all day long.  While eating, while shopping, while "chilling".....and most often of herself.  Oh yeah, lots and lots and LOTS of photos of herself. 


And yes, this is the same daughter that always gives me THE HAND when I pull out MY camera. [check my blog post HERE to see some classic Hand pics]


So I had a really good idea, and I said to her, "Hey, do you realize that you are chronicling your entire life practically moment by moment with your iPhone photos?"  and then I expressed how much I would enjoy having some of those photos to scrapbook. 


Guess what DQ gave to me a few days later??  A memory stick, filled with her iPhone photos.  I could NOT believe it.  How lucky am I???


It turns out....not so lucky.  And some nasty feelings about the iPhone arose as I downloaded her photos onto my computer and checked them out. 


Here is the first photo....

And the next....

And the third....well, at least she got her baby sister in the shot too.

Yes, there are more!  Because there are so many apps and filters that she uses.  In fact, sometimes I feel like an alien (called the iPhone) has abducted her.  Now I have proof!


She's so thoughtful...she even included some photos of the two of us....

And I thought I didn't have many wrinkles.
At least I now know what she does during school hours....in the Girls Washroom....

Nice toilets and sink....things haven't changed much since I've been to school. Black toilet seats!


I'm thinking of enrolling her in a Photography COMPOSITION and BACKGROUND class.
How nice!  A photo of some of the volleyball team! In the Girls Washroom.


I admit, it's not all bad.  After scrolling through about 100 shots, there were about 4 iPhone photos that I am pretty pleased to have...
My birthday flowers and me.

Sisters in the van.

An affectionate moment between DQ and BOF.....shocking!


My big brother and my mother at Christmas.
Hmmm...looking at these last few photos makes me feel like there's hope that my iPhone obsessed daughter could become the family genealogist after all.

And so I was inspired to create a layout to capture this phase of crazy pics in DQ's life...
The pearls are from KaiserCraft

I used mostly Heidi Swapp new Sugar Chic papers in the monthly sketch kit at The Urban Scrapbook.  This is such a fun, colourful collection... perfect for teens!

After I finished this layout, I thought, hey, maybe the iPhone isn't so bad after all :) 


Wednesday, May 9, 2012

May Sketchy Challenge

National Scrapbook Day has come and gone...and I am still in creative heaven after spending 3 days on a scrapbooking retreat with the amazing team from Canadian Scrapbooker magazine.  Good times, belly laughs and special friendships....all make for the perfect scrap happy event!

Today I thought I'd share my layout for the monthly Sketchy Challenge over at www.canadianscrapbooker.ca  

Here is the sketch by Jill Sarginson....
 And here is my layout....
BabyOfTheFamily is a child of nature and is happiest outdoors, enjoying God's creatures, great and small.
Did I interpret this sketch exactly or what?? ha ha!


I couldn't help it really.  The KaiserCraft papers were perfect for my design concept ....and I had a wonderful sheet of raw chipboard from Magenta (the tree, grass, clouds and sun).
The layered chipboard animals (including Bambi here) and stickers are all from the KaiserCraft "Tiny Woods" collection.  So Cute!
I decided to alter the Magenta chipboard pieces with Clearsnap's new Donna Salazar Mixed Media Inx and embossing powders....LOVE them!
After inking and embossing the clouds with "Jasmine", I edged them in blue "Denim" ink. 

The tree is actually stamped with a Magenta leaf stamp, but the leafy images are masked by the UTEE.  The trunk is inked and embossed with Donna Salazar "Leather."

These are pigment inks and are wonderful to work with.  In fact, I'm determined to do more stamping, embossing and inking techniques on my layouts.  I am so lucky to be able to learn from the amazing Cathie Allen, who is a creative genius when it comes too ALL things crafty.  The way she uses stamps and inks is.....WOW.

You know what I love most about the Donna Salazar Mixed Media Inx?  Their names! ha ha!
"Mossy....Leather....Denim....Jasmine....Chiffon...."
A whole bunch of YUMMY.

Here's a deep dark yearning of mine: I want a job naming inks!  Yes I do.  In fact, at the retreat last weekend, I announced this "wish" of mine and did some brainstorming of ink names. 

Mind you, this collection of inks is for crafters who are age 40+  ....

Varicose Vein Purple

Alimony Green

Age Spots Brown

Hot Flash Red

Grey Hair

What do you think?  My own line of Distress Inks to create that "Aged Look."  

Will Clearsnap hire me? 


Tuesday, May 1, 2012

Mother's Day Cards

When my turn came around again to do a blog post for Canadian Scrapbooker magazine this week, I was excited that the date was in May....because I wanted to share another flower technique and Mother's Day is coming up.

I was also excited about a new Spellbinders Donna Salazar die I bought called "Bitty Blossoms."
Spellbinders Donna Salazar "Bitty Blossoms"
I have been enjoying making my own simple spiral roses lately, and when I saw this die, I  wanted to give it a try.
Check.  It.  Out.  I am ALL OVER this Spellbinders die! 

I LOVED the results....I was making flowers day and night! (slight exaggeration)

I made a card featuring the simple spiral roses and another card using this Spellbinders die.....both with Karen Foster's Mother's Day patterned paper. 
Hmmmm....I just might have to give one of these to MYSELF on Mother's Day.


Here's a closer look at the roses on the card...
They are so pretty clustered together with a ribbon.
 If you'd like to see how I made both of these types of spiral flowers, I created a detailed step-by-step photo tutorial over at the Canadian Scrapbooker's website posted on Jackie's blog called "Tuesday With The Team."  Click HERE to see the tutorial.


Next week, I'll be posting a special framed Mother's Day layout on my blog that also features these Spellbinders flowers...and lots of other cool techniques!


Friday, April 27, 2012

My Mind's Eye is...AMAZING!

When I first saw the My Mind's Eye Follow Your Heart collection, I was smitten!  I immediately knew I wanted to design a class layout with the "Be Amazing" papers...just love those hexagon patterns!


Here is what I came up with...

I created some cool embellishments using Ranger Inkssentials Foil Tape Sheets and alcohol ink. 

Here are some close ups...
These buttons are part of this collection...I made the black butterflies using a Martha Stewart punch.

Love the dimensional stickers from this collection too!  And the ribbon is Maya Road.
 Making these foil embellishments was really fun.  I cut the sun freehand, but the butterflies and hearts are cut with Sizzix dies and my Big Shot.  

To make any of these elements, you'll need Ranger Foil Tape Sheets, alcohol inks, a piece of paper, dies, an embossing folder (I used a damask pattern by Tim Holtz), and a die cutting machine (Big Shot).
I coloured my sun and hearts with Caramel (or Butterscotch) alcohol ink and the butterflies with Stream.
Cut a piece of foil that will fit the size of your die, peel off the adhesive backing (CAREFUL:  very sticky!), and adhere to a piece of paper (you can use any piece of scrap paper).
I didn't use just any piece of scrap paper...I used a lovely extra piece of MME left over from my layout :)
 Trim the foil/paper piece so it can be cut by your die...

These butterflies are movable dies so they are sitting on a base tray (they are magnetic).
cu
Roll through your Big Shot and cut out the butterflies.

Place foil butterflies in damask patterned embossing folder and run through the Big Shot again.

And your butterfly will now look like this....I just LOVE how this foil tape embosses!

Gently squeeze Stream alcohol ink (or any colour you like) onto the butterfly.
Spread the alcohol ink using the tip of the bottle.  The more ink, the darker the colour.
 Because the foil is flexible, you can now play with your embellishments and bend them however you like....
I adhered only the centre of this butterfly with a pop dot and then lifted its wings off the page.
 The possibilities are endless with this "Amazing" line of papers by My Mind's Eye!

Monday, April 23, 2012

Baby....It's Graphic 45 again!

I think most of us fell in love with the Graphic 45 "Little Darlings" collection when it was released this spring.  All of those cherubic sweet faces...I could almost smell the baby powder and freshly bathed skin :)  A far cry from my sweaty hormonal teenagers!!


Of course, I had to design with these papers the minute I saw them...and so I created this double page layout, simply called "Baby", featuring my adorable DramaQueen, age 3 months.

The background is 2 pieces of G45's ABC Primer paper called "One Two Buckle your Shoe". 

Here are some close ups....some lovely fussy cut elements...
A cream eyelet curtain is over the window....

A war time technique....using the curtain fabric to make a skirt! lol.

This was a class I taught at Urban Scrapbook last month, and thanks to Lynette's advice, I offered it as either Boy or Girl.....and here is the Boy version (but with the same girl photos!)

I changed up the pink gingham paper with blue paper and switched the girl image cut outs with boy versions....the sleeping boy in the lattice window and the bugle boy at far right.  I also inked the block pieces with blue instead of pink.
The little heart is cut from "Beach" Bazzill cardstock using a Sizzix Embosslit die from Stampin Up.

Blue Bugle Boy beside blocks that are inked blue....yes, a stereotype, I know.
Most of you know how to make those spiral roses, but if not, I'll explain how on the Canadian Scrapbooker blog next week (Tuesday With The Team on May 1, 2012).


Here is a close up of the Little Darlings banner...lots of fussy cutting involved.
The butterflies are cut from the G45 patterned paper called "Heaven Sent."


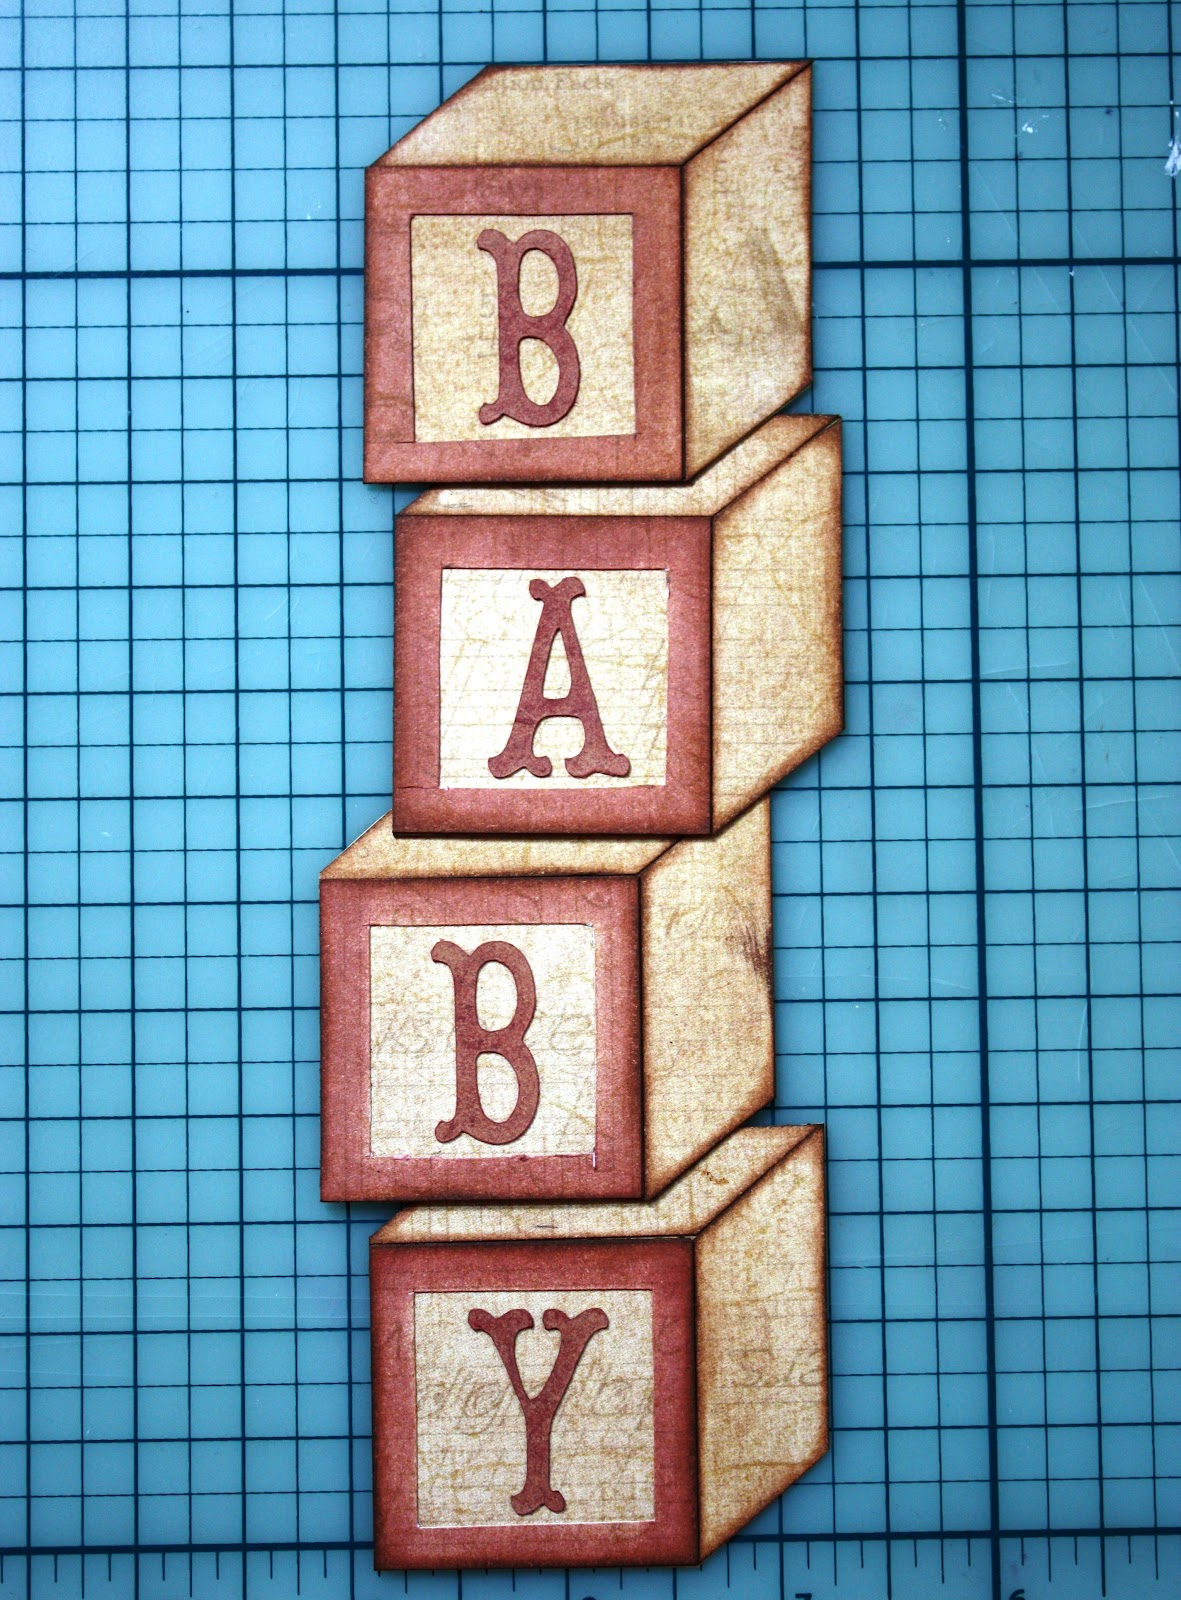
The two elements that I designed as special techniques are the lattice window and the baby blocks title.  

I saw the lattice window first on a card over at Scrapbook.com....in Peggy's gallery.  She is an expert card maker and you can visit her blog HERE.

To make the window frame, cut into a 5x7" piece of chipboard, leaving a 1/2" frame around. Then I covered one side of the frame with my tape runner adhesive and wrapped a wide cream satin ribbon around and around the frame...taking care with the corners...
You actually don't have to bother covering the top of the frame with the ribbon because it is hidden under the curtain.
The finished ribbon wrapped window frame
For the lattice I cut 1/4" strips of cream cardstock and lay them on the yucky side of the ribbon frame.  TIP:  Adhere the longest strip (diagonal corner to corner) first.  Then you can adhere the other strips parallel and do the same crossing over them and weaving over and under the other way.
This will be the back of your ribbon frame...just decide which side you like least and adhere the strips to that side.


Lucky for me, my talented scrappy friend Michelle posted a wonderful tutorial on her blog about how to make a lattice card, which will give me an excuse NOT to type up a detailed explanation.  Instead, you can visit her blog and lattice tutorial HERE.   
Michelle's lovely series of lattice window cards


As well, Michelle used this same "Little Darlings" collection to make the most adorable mini album and storage tin...you can check it out with another awesome tutorial HERE.  Thanks Michelle! 
Michelle's Little Darlings accordion mini album

And the altered tin that holds the album
 Now back to the next technique on my layout. 

 The baby blocks are my favourite element on this layout....and are made by an easy paper piecing technique.

I started by sketching a block....I wanted a vintage baby block (the kind I used to play with...and yes, I know I described them as "vintage"). 
A peek into my private sketch book :)
 From this sketch I made a tracer for 4 pieces: top, side and  2 front square blocks (which measure 1.5" each side)
I used a Prima medium brown chalk ink along these paper piece edges.


Take one of the 1.5" square blocks and ink edges with pink or blue to make the front frame.
With a 1" square template,  trace a square for cutting out in the centre of your inked block.
Tracing is finished and the frame will measure 1/4" when complete....so use your craft knife...
...and your metal ruler to cut out the centre, leaving you with a pink block frame.

Now you have an inked frame to adhere to the top of your plain block front.
Adhere all your pieces together like a puzzle to a piece of kraft cardstock, or the patterned paper you made the blocks from, and cut around.
I cut the "BABY" alphabet letters with my Cricut, Storybook Cartridge, from the same patterned paper, and inked them.
Then I played with my blocks....I staggered them...
....and I stacked them!  Actually, I LOVE them stacked, but this didn't work with my layout design :(


You can try using kraft cardstock for the blocks, but I preferred the appearance of the patterned paper, which is actually from Graphic 45's "ABC Primer" collection, last fall, and the paper is called "Happy Go Lucky." 

A couple of other cute page elements are the tulle bow toppers and the Cricut journalling spot....
I fooled around with my Lacy Labels cartridge until I found the journalling spot that was just right...a scalloped oval.

This cartridge is fantastic....each label has a delicate top layer, which I cut out of pink Little Darlings paper (and blue for boy)
An oops on my behalf....I forgot to write in the journaling spot until after I took the photos.  It does say "Serena Jade, Age 3 months, March 1997."


The tulle bows running across the top of the layout are a pretty element that involves colouring white tulle with Distress Ink.  I experimented with the Distress Ink when I couldn't find the right colour of tulle to match the layout papers.
I dragged the Wild Honey Distress Ink pad across the length of tulle (about a yard)
Use a cloth to wipe the excess ink off the tulle...a lot will come off, but the tulle will still be coloured. TIP:  Do not use paper towel to wipe off the excess ink...there will be bits of paper towel stuck inside the fibres of the tulle (experience talking here)
Then you can spend about 3 hours trying to tie two bows into the ends of a foot long length of tulle.  Torture.
Am I making this tulle topper technique sound appealing?  Oh, and let's not leave out the yellow/orange hands you'll be left with...
Yikes.  Makes me look like a heavy smoker who has eaten a couple bags of Cheezies!!!

You might be seeing a few more layouts in the near future featuring DQ....because lately she expressed her displeasure about how many pages I make for BabyOfTheFamily and not her.  

This means you might also be reading a blog post about sibling rivalry in the near future as well :)

Now it's time for me to slip this layout into DQ's album....and fondly recall what a lovely baby she was, the easiest of the three by far :)