I am hesitant to announce this, but I have a new Double the Fun layout sketch up on the Canadian Scrapbooker website….for SUMMER 2014! Ha ha. That is how the magazine industry rolls. Everything is planned waaaaay ahead. While working on my Christmas cards and crafts, my creative mind is also thinking about Spring and Summer.
Here is my new sample layout…
After weeks of harassing my teenagers, I finally wrangled them together for our annual fall photo shoot. Ok, so the picture snapping only lasted 4 minutes just before our Thanksgiving dinner last month, but this is better than nothing!
Here is my new sketch, which I hope you'll try using for one of your layouts…
I used the gorgeous DCWV "Industrial Chic" Stack which is full of deep, rich patterns and colours, perfect for fall, vintage, masculine and so on.
Plus, the larger photo in the centre has a burlap mat, from the DCWV Burlap Stack. I love the texture that it brings to the layout.
Some close-ups…
The small black type alphabet stickers are Glitz Design and the heart and 'ticket' and key are all cut from the patterned DCWV papers.
The hearts are just cut freehand from that red paper, and I inked the edges with Clearsnap black chalk ink.
My journaling tag is cut from the DCWV paper as well. Then I punched two holes at the top corners and wrapped my twine through.
The bottom border of the layout has a May Arts twill ribbon running across.
I hope you enjoy this new sketch…and you have LOTS of time to submit your layout before the deadline: February 15, 2014!
Showing posts with label BoyGenius. Show all posts
Thursday, November 28, 2013
Saturday, September 14, 2013
Back To School !
It's that time of the year when all parents are kicking up their heels because it's Back to School! This summer I did enjoy not rushing around in the morning, worrying about missing the bus, forgetting books and lunches and telling the girls, "No, you can't wear THAT to school!" ha ha
But routine is good for us, too, and now I will have more of a routine time to blog and scrapbook.
Here is a layout I designed for the Create & Connect trade show in Vegas, and it's up on The Crafty Power blog. I used 4 of the 3D foam Designer Shapes: wings, stars, heart, and rectangle/frame:
I have a simple tutorial on how I made those red stars....so click HERE to visit their blog and check it out. The papers are FancyPants Designs and the stamps are Stampin' Up! and Graphic 45 (alphabet). The silver glitter is EK Success/Martha Stewart.
Confession: The photo is from last year's first day of school. Here is this year's pics from last week:
Oh well, two out of three isn't bad. Ha!
But routine is good for us, too, and now I will have more of a routine time to blog and scrapbook.
Here is a layout I designed for the Create & Connect trade show in Vegas, and it's up on The Crafty Power blog. I used 4 of the 3D foam Designer Shapes: wings, stars, heart, and rectangle/frame:
I have a simple tutorial on how I made those red stars....so click HERE to visit their blog and check it out. The papers are FancyPants Designs and the stamps are Stampin' Up! and Graphic 45 (alphabet). The silver glitter is EK Success/Martha Stewart.
Confession: The photo is from last year's first day of school. Here is this year's pics from last week:
| BabyOfTheFamily is in Grade 8 |
| DramaQueen is in Grade 11 |
![]() |
| BoyGenius heads off to University |
Thursday, June 6, 2013
Motherhood
I went to a funeral yesterday. Colleen was 49 when she passed away last week after battling cancer for a year. It is beyond tragic.
I hate funerals, but this one was especially tough....because she is a mother, and her two daughters are teenagers. Her younger daughter is my youngest daughter's best friend.
It makes me realize how precious my children are...
and many days I wish they were little again...
Playing with blocks and not driving cars....
Not graduating from high school....
or wearing make-up...
Just sitting on the floor....
...and not walking away from me yet.
I joke around a fair bit about raising children, especially teenagers, but I'm the one with separation anxiety now, and I'm not ready to let them go. I hope they are patient with me....it could take awhile....and a lot of scrapbooking.
I hate funerals, but this one was especially tough....because she is a mother, and her two daughters are teenagers. Her younger daughter is my youngest daughter's best friend.
It makes me realize how precious my children are...
Playing with blocks and not driving cars....
Not graduating from high school....
or wearing make-up...
Just sitting on the floor....
...and not walking away from me yet.
I joke around a fair bit about raising children, especially teenagers, but I'm the one with separation anxiety now, and I'm not ready to let them go. I hope they are patient with me....it could take awhile....and a lot of scrapbooking.
![]() |
| L-R: BoyGenius, BabyOfTheFamily and DramaQueen with their Mama. |
Monday, April 22, 2013
Altered Kaisercraft Photo Display
I have long admired the beautiful photo displays that scrapbookers design to showcase their family photos. Kaisercraft has a number of wonderful photo frames, and I decided to alter their "Swap Card Photo Display."
Click HERE to visit their website and see other finished Photo Displays.
The Pickled Pear collection is gorgeous and was perfect for my design...
I chose 3 photos of my children from our Fall photo shoot...
The background is ONE piece of paper...un-cut!
And the embellishments are from the Pickled Pear Sticker, along with Kaisercraft black Paper Blooms and Pewter Pearls...
I also used some copper wire and scrap pieces of corrugated cardboard...
I painted the raw frame with Ranger's Claudine Hellmuth Black Gesso.
Here is a video tutorial that shows my quick and easy painting technique along with a closer look at the finished tray.
Click HERE to watch this on YouTube and visit my Channel.
I love how this turned out...especially because it took no time at all!
Click HERE to visit their website and see other finished Photo Displays.
The Pickled Pear collection is gorgeous and was perfect for my design...
I chose 3 photos of my children from our Fall photo shoot...
The background is ONE piece of paper...un-cut!
![]() |
| "Pistachio" |
I also used some copper wire and scrap pieces of corrugated cardboard...
I painted the raw frame with Ranger's Claudine Hellmuth Black Gesso.
Here is a video tutorial that shows my quick and easy painting technique along with a closer look at the finished tray.
I love how this turned out...especially because it took no time at all!
Thursday, April 11, 2013
Kickin' It with Kaisercraft
On Sunday, my baby boy turned 18. Gulp. Shocking but true.
We had lots of wonderful family time all weekend with him, and a very special guest showed up as a "Surprise!"
Quite awhile ago I decided to work on birthday layouts right after they happened....when everything is fresh in my mind. So I grabbed a photo of BoyGenius from Sunday and looked for papers.
The Kaisercraft "75 Cents" collection is perfect for a 'guy page.'
I also found this sketch on the Kaisercraft blog, for their April Saturday sketch challenge...
And here is my layout based on the sketch...
Those cool number tags are a TM Exclusives product from my local scrapbook store, Treasured Memories.
The keys are older K & Company, and I cut that heart from a scrap piece of corrugated cardboard.
The copper wire is Art-C, and the chevron stamp is Bo Bunny. I used both Clearsnap and Prima chalk inks for the edges and on the heart.
If you would like to see how this layout came together, I made a video tutorial.
Click HERE to watch it on YouTube....and you can also subscribe to my channel if you'd like to watch more of my videos in the future.
I enjoyed designing with this Kaisercraft collection so much that I've already started another layout! Stay tuned....
![]() |
| BoyGenius on his FIRST birthday :) |
We had lots of wonderful family time all weekend with him, and a very special guest showed up as a "Surprise!"
![]() |
| His Uncle Howard surprised him and flew in from Nicaragua to celebrate his birthday |
![]() |
| His sister decorated the cake |
![]() |
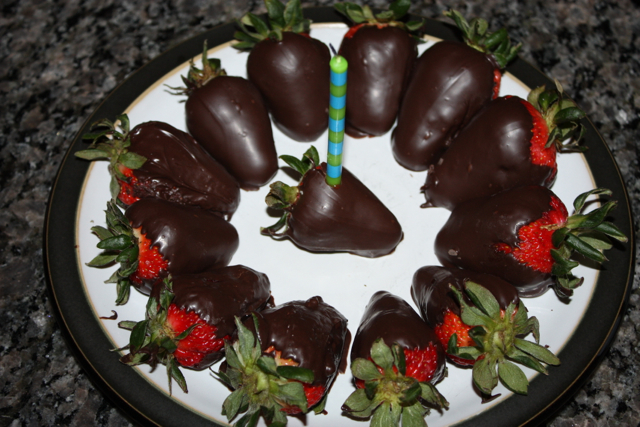
| Not a cake kinda guy...thus the chocolate strawberries. |
The Kaisercraft "75 Cents" collection is perfect for a 'guy page.'
I also found this sketch on the Kaisercraft blog, for their April Saturday sketch challenge...
And here is my layout based on the sketch...
Those cool number tags are a TM Exclusives product from my local scrapbook store, Treasured Memories.
The keys are older K & Company, and I cut that heart from a scrap piece of corrugated cardboard.
The copper wire is Art-C, and the chevron stamp is Bo Bunny. I used both Clearsnap and Prima chalk inks for the edges and on the heart.
![]() |
| I used a fine-tipped Sharpie to draw faux stitches |
If you would like to see how this layout came together, I made a video tutorial.
I enjoyed designing with this Kaisercraft collection so much that I've already started another layout! Stay tuned....
Monday, March 18, 2013
March Sketchy Challenge
For this month's Sketchy Challenge at Canadian Scrapbooker, I decided to have some fun with another new Bo Bunny collection called "Family Is..."
Immediately I thought of some recent pics of my teenagers. Sure, I had one "good" shot of them together for DramaQueen's birthday, but why scrap that photo when I had 10 other funny outtakes?
I love the colourful, bright patterns....a reflection of my chaotic, loud teens!
Using the card stock and chipboard stickers makes designing a breeze...
I also did a fast forward video of how this layout came together. [You can click HERE to go to YouTube and watch on a bigger screen. You can also click "Subscribe" if you'd like to watch all my videos]
I hope you can join in the fun over at the Sketchy gallery this month! It's a friendly online community with lots of inspiration!
I am POSITIVE that the paper designers at Bo Bunny had a real life peek inside MY family when they came up with these hilarious and playful stickers...
Here is Sue Sykes' awesome March sketch...Immediately I thought of some recent pics of my teenagers. Sure, I had one "good" shot of them together for DramaQueen's birthday, but why scrap that photo when I had 10 other funny outtakes?
I love the colourful, bright patterns....a reflection of my chaotic, loud teens!
Using the card stock and chipboard stickers makes designing a breeze...
I also did a fast forward video of how this layout came together. [You can click HERE to go to YouTube and watch on a bigger screen. You can also click "Subscribe" if you'd like to watch all my videos]
I hope you can join in the fun over at the Sketchy gallery this month! It's a friendly online community with lots of inspiration!
Wednesday, December 12, 2012
Christmas with Carta Bella
Our monthly staff challenge and December kit at The Urban Scrapbook features wonderful papers from Carta Bella's "Merry and Bright" collection.
I love the non-traditional colour palette that has pink and pale turquoise! So cute!
Here is Lynette's sketch and my layout...
There is a story behind these photos of BoyGenius at Age 2, his second Christmas.
While I was pregnant, I knit that sweater for my baby's first Christmas. Well, it turned out a little on the BIG side, so it ended up fitting him for his second Christmas.
I was SO excited about my baby boy wearing something that I had knit. I'm actually not much of a knitter, and when I look at these photos, I think, "Huh? How the heck did I ever knit that?"
Christmas day arrived and I gave BoyGenius his precious sweater, with camera in hand. Of course, there was NO WAY he was going to wear it. He refused to put it on. [To say that BG is a strong-willed spirited child is an understatement]
Did I mention I was 9 months pregnant with his sister at the time...and she was due on Christmas Day? I gave up trying to convince him and left the room in tears.
Moments later, Daddy and BG came to find me and he was wearing the sweater! Ok, so it was only for 15 minutes, and a few snapshots later he pulled it off, never to be worn again. It wasn't the Hallmark moment I was imagining, but at least I have a scrapbook page now. ha ha!
Now back to the page design and this kit...
These raw chipboard letters were cut with a Sizzix alphabet die. I painted them red and covered them with Glossy Accents.
I used the Prima Metal Trinket Typo Bulb as a template and traced more bulbs for my banner on American Crafts glitter paper. The silver tops of the bulbs are cut from silver glitter ribbon.
There were 2 large flowers in the kit. I cut the petals off my green flower to make my Christmas tree. I simply adhered the petals to a triangular piece of green card stock.
I used the petals from my red flower to make the 3 hearts. The border is a Martha Stewart edge/corner punch set.
I love the non-traditional colour palette that has pink and pale turquoise! So cute!
Here is Lynette's sketch and my layout...
![]() |
| "Made with Love" |
While I was pregnant, I knit that sweater for my baby's first Christmas. Well, it turned out a little on the BIG side, so it ended up fitting him for his second Christmas.
I was SO excited about my baby boy wearing something that I had knit. I'm actually not much of a knitter, and when I look at these photos, I think, "Huh? How the heck did I ever knit that?"
Christmas day arrived and I gave BoyGenius his precious sweater, with camera in hand. Of course, there was NO WAY he was going to wear it. He refused to put it on. [To say that BG is a strong-willed spirited child is an understatement]
Did I mention I was 9 months pregnant with his sister at the time...and she was due on Christmas Day? I gave up trying to convince him and left the room in tears.
Moments later, Daddy and BG came to find me and he was wearing the sweater! Ok, so it was only for 15 minutes, and a few snapshots later he pulled it off, never to be worn again. It wasn't the Hallmark moment I was imagining, but at least I have a scrapbook page now. ha ha!
Now back to the page design and this kit...
These raw chipboard letters were cut with a Sizzix alphabet die. I painted them red and covered them with Glossy Accents.
I used the Prima Metal Trinket Typo Bulb as a template and traced more bulbs for my banner on American Crafts glitter paper. The silver tops of the bulbs are cut from silver glitter ribbon.
There were 2 large flowers in the kit. I cut the petals off my green flower to make my Christmas tree. I simply adhered the petals to a triangular piece of green card stock.
I used the petals from my red flower to make the 3 hearts. The border is a Martha Stewart edge/corner punch set.
| I tucked a journaling tag under the photo, with the story of this Christmas Sweater |
This sweater pretty much ended my knitting career, and I haven't knit anything since.
But I have it carefully stored away, and when BoyGenius has his first child, you can bet Grandma is going to be wrapping up a very special sweater for Christmas!
To see what the rest of the Urban Design Team has created with this kit, please click HERE.
Subscribe to:
Posts (Atom)