I love being on the Scrapbook Adhesives by 3L Design Team. I have the opportunity to work with a huge variety of manufacturers' product and, of course, the best adhesives around. With the new release of 3D Foam Designer Shapes, I've been having fun creating projects and here is a card featuring three of the shapes: a 3D Frame, Star and some Trees.
There are lots of ways to alter the foam shapes, and I used glitter and embossing powder.
There is a step-by-step photo tutorial on how I designed this card on the Crafty Power Blog, so click HERE to stop by there and check it out.
Scrapbook Adhesives by 3L also has a brand new website… it looks awesome! Click HERE to head over there. Thanks for stopping by.
Showing posts with label stamps. Show all posts
Wednesday, November 13, 2013
Saturday, September 14, 2013
Back To School !
It's that time of the year when all parents are kicking up their heels because it's Back to School! This summer I did enjoy not rushing around in the morning, worrying about missing the bus, forgetting books and lunches and telling the girls, "No, you can't wear THAT to school!" ha ha
But routine is good for us, too, and now I will have more of a routine time to blog and scrapbook.
Here is a layout I designed for the Create & Connect trade show in Vegas, and it's up on The Crafty Power blog. I used 4 of the 3D foam Designer Shapes: wings, stars, heart, and rectangle/frame:
I have a simple tutorial on how I made those red stars....so click HERE to visit their blog and check it out. The papers are FancyPants Designs and the stamps are Stampin' Up! and Graphic 45 (alphabet). The silver glitter is EK Success/Martha Stewart.
Confession: The photo is from last year's first day of school. Here is this year's pics from last week:
Oh well, two out of three isn't bad. Ha!
But routine is good for us, too, and now I will have more of a routine time to blog and scrapbook.
Here is a layout I designed for the Create & Connect trade show in Vegas, and it's up on The Crafty Power blog. I used 4 of the 3D foam Designer Shapes: wings, stars, heart, and rectangle/frame:
I have a simple tutorial on how I made those red stars....so click HERE to visit their blog and check it out. The papers are FancyPants Designs and the stamps are Stampin' Up! and Graphic 45 (alphabet). The silver glitter is EK Success/Martha Stewart.
Confession: The photo is from last year's first day of school. Here is this year's pics from last week:
| BabyOfTheFamily is in Grade 8 |
| DramaQueen is in Grade 11 |
![]() |
| BoyGenius heads off to University |
Tuesday, July 16, 2013
ScrapThat! July Kit Tutorials
Today I have two video tutorials posted on the ScrapThat! blog using the wonderful July kit.
The first technique I share is how to create a simple tulle flower that is on my vintage wedding layout.
On my second layout, I used the Prima stamp and Smooch ink from the kit to alter these scrabble tiles for my title:
So stop by the ScrapThat! blog by clicking HERE and enjoy the videos!
The first technique I share is how to create a simple tulle flower that is on my vintage wedding layout.
On my second layout, I used the Prima stamp and Smooch ink from the kit to alter these scrabble tiles for my title:
So stop by the ScrapThat! blog by clicking HERE and enjoy the videos!
Monday, May 13, 2013
She Sparkles!
My daughter turned 16 this year, and I've been making a few layouts to commemorate this special time in her life.
I used the new Kaisercraft "Remember Me" collection....a beautiful palette of red and black and tan.
The design is based on the Kaisercraft May Saturday Sketch #1 Challenge.
On the Crafty Power Blog, I shared the simple technique of how to "wear your adhesive on the outside" by using black glitter with my Scrapbook Adhesives by 3L Crafty Power Tape to create a sparkly border along my stamped lace edges.
It's hard to see the sparkle, but it looks so pretty in real life!
Click HERE to visit the Scrapbook Adhesives by 3L blog to see my step-by-step photo tutorial on how I made this glittery border.
I created this layout during a beautiful weekend away on a Scrapbooking retreat, nestled in the Rockie Mountains, at the wonderful Bull River Guest Ranch.
No, I didn't pluck them fresh off the birds....I found the feathers while walking around the grounds one sunny afternoon and added them to my layout.
The "S" is glittered too with Craft&Glitz black glitter.
All of the pretty wood embellishments are Kaisercraft also, and I punched those scallop circles with an EK Success punch.
The heart pin is Maya Road (kindly given to me from Connie Nichol who was scrapping across the table).
In reality, I said, "Hey Connie, your Diamond Glaze bottle is plugged...so she gave me a pin to clear the tip....and never got the pin back because I popped it onto my layout!" Ha ha! Thank you Connie for all the wood embellies too :)
When I saw the Kaisercraft Saturday sketch, I thought I'd give my daughter some advice in terms of journaling and found the PERFECT Kaisercraft Rub-ons from the "In the Attic" collection. I LOVE these quotations!
The 'Remember' arrow is a Technique Tuesday stamp.....and there is a funny story behind that too! Another friend from Canadian Scrapbooker magazine, Katharina Doyle, was sitting nearby, and I cannot even remember why I went to talk with her...but I ended up pulling some stamped arrows out of her trash bin! Yep, dumpster diving for layout embellishments!
I might as well admit that the rest of the Canadian Scrapbooker team helped me out too: Jackie Ludlage gave me the Crafty Power Tape and black glitter. Oh, and Cathie Allan let me borrow her stamping block. Oops...the scallop punches weren't mine either (I forget whose!)
I guess this layout is truly a group effort! Don't you just love scrapbook retreats and crops??
I used the new Kaisercraft "Remember Me" collection....a beautiful palette of red and black and tan.
The design is based on the Kaisercraft May Saturday Sketch #1 Challenge.
On the Crafty Power Blog, I shared the simple technique of how to "wear your adhesive on the outside" by using black glitter with my Scrapbook Adhesives by 3L Crafty Power Tape to create a sparkly border along my stamped lace edges.
Click HERE to visit the Scrapbook Adhesives by 3L blog to see my step-by-step photo tutorial on how I made this glittery border.
I created this layout during a beautiful weekend away on a Scrapbooking retreat, nestled in the Rockie Mountains, at the wonderful Bull River Guest Ranch.
![]() |
| This is the main lodge where we scrapped and ate the most amazing gourmet meals. |
![]() |
| There is a hobby farm too....and this strange smiling goat. |
![]() |
| These lovelies helped embellish my layout with their pretty feathers. |
The "S" is glittered too with Craft&Glitz black glitter.
All of the pretty wood embellishments are Kaisercraft also, and I punched those scallop circles with an EK Success punch.
The heart pin is Maya Road (kindly given to me from Connie Nichol who was scrapping across the table).
In reality, I said, "Hey Connie, your Diamond Glaze bottle is plugged...so she gave me a pin to clear the tip....and never got the pin back because I popped it onto my layout!" Ha ha! Thank you Connie for all the wood embellies too :)
When I saw the Kaisercraft Saturday sketch, I thought I'd give my daughter some advice in terms of journaling and found the PERFECT Kaisercraft Rub-ons from the "In the Attic" collection. I LOVE these quotations!
The 'Remember' arrow is a Technique Tuesday stamp.....and there is a funny story behind that too! Another friend from Canadian Scrapbooker magazine, Katharina Doyle, was sitting nearby, and I cannot even remember why I went to talk with her...but I ended up pulling some stamped arrows out of her trash bin! Yep, dumpster diving for layout embellishments!
I might as well admit that the rest of the Canadian Scrapbooker team helped me out too: Jackie Ludlage gave me the Crafty Power Tape and black glitter. Oh, and Cathie Allan let me borrow her stamping block. Oops...the scallop punches weren't mine either (I forget whose!)
I guess this layout is truly a group effort! Don't you just love scrapbook retreats and crops??
Tuesday, April 16, 2013
A Place Called Home
I think everyone knows by now that I have a fondness for vintage layouts and heritage photos. Lately, I've found myself gravitating towards my mother's scrapbooks, enjoying the beautiful black and white photos, trying to imagine her life "back in the day."
The Kaisercraft "75 Cents" collection seemed perfect for this layout...
This is the family my mom rented a room from when she was working as a single woman in a small country town.
For the design, I used this wonderful sketch from Sketchbook 365...
Some close-ups...
Here is a closer look at the roof...
I was inspired by my friend Michelle's birdhouse she recently designed. Click HERE to visit her blog and see her amazing birdhouses.
Here is a simple tutorial on how I made my roof:
It's easy, isn't it? Now you can tell your family and friends that you shingled a roof today!
Who said scrapbooking isn't labour intensive?
The Kaisercraft "75 Cents" collection seemed perfect for this layout...
For the design, I used this wonderful sketch from Sketchbook 365...
Some close-ups...
![]() |
| I layered some stickers, created the fence from strips of paper, and the key is K&Co. |
![]() |
| These adorable little clips are Stampin' Up! |
![]() |
| I used two alphabet stamp sets: the smaller one is Hero Arts and the other is Graphic 45 |
Here is a closer look at the roof...
I was inspired by my friend Michelle's birdhouse she recently designed. Click HERE to visit her blog and see her amazing birdhouses.
Here is a simple tutorial on how I made my roof:
![]() |
| Cut a triangle roof out of scrap card stock |
![]() |
| Cover it with adhesive |
![]() |
| Punch scallop edges on strips of paper |
![]() |
| Stack up an arrangement of your strips so they will fit on your roof |
![]() |
| Layer the strips starting at the roof's bottom edge |
![]() |
| Flip over roof and trim strips off along side edges |
![]() |
| Gently curl up scallop edges for dimension |
Who said scrapbooking isn't labour intensive?
Thursday, April 11, 2013
Kickin' It with Kaisercraft
On Sunday, my baby boy turned 18. Gulp. Shocking but true.
We had lots of wonderful family time all weekend with him, and a very special guest showed up as a "Surprise!"
Quite awhile ago I decided to work on birthday layouts right after they happened....when everything is fresh in my mind. So I grabbed a photo of BoyGenius from Sunday and looked for papers.
The Kaisercraft "75 Cents" collection is perfect for a 'guy page.'
I also found this sketch on the Kaisercraft blog, for their April Saturday sketch challenge...
And here is my layout based on the sketch...
Those cool number tags are a TM Exclusives product from my local scrapbook store, Treasured Memories.
The keys are older K & Company, and I cut that heart from a scrap piece of corrugated cardboard.
The copper wire is Art-C, and the chevron stamp is Bo Bunny. I used both Clearsnap and Prima chalk inks for the edges and on the heart.
If you would like to see how this layout came together, I made a video tutorial.
Click HERE to watch it on YouTube....and you can also subscribe to my channel if you'd like to watch more of my videos in the future.
I enjoyed designing with this Kaisercraft collection so much that I've already started another layout! Stay tuned....
![]() |
| BoyGenius on his FIRST birthday :) |
We had lots of wonderful family time all weekend with him, and a very special guest showed up as a "Surprise!"
![]() |
| His Uncle Howard surprised him and flew in from Nicaragua to celebrate his birthday |
![]() |
| His sister decorated the cake |
![]() |
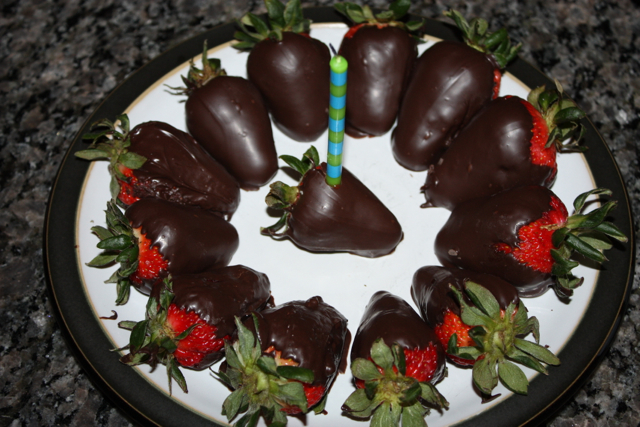
| Not a cake kinda guy...thus the chocolate strawberries. |
The Kaisercraft "75 Cents" collection is perfect for a 'guy page.'
I also found this sketch on the Kaisercraft blog, for their April Saturday sketch challenge...
And here is my layout based on the sketch...
Those cool number tags are a TM Exclusives product from my local scrapbook store, Treasured Memories.
The keys are older K & Company, and I cut that heart from a scrap piece of corrugated cardboard.
The copper wire is Art-C, and the chevron stamp is Bo Bunny. I used both Clearsnap and Prima chalk inks for the edges and on the heart.
![]() |
| I used a fine-tipped Sharpie to draw faux stitches |
If you would like to see how this layout came together, I made a video tutorial.
I enjoyed designing with this Kaisercraft collection so much that I've already started another layout! Stay tuned....
Friday, December 21, 2012
A Merry Christmas to All!
This is my last blog post before Christmas. I waited until today because I wasn't sure if the world was ending or not. Looks like we're good to go! I guess the Mayans weren't great at making calendars after all.
I thought I would share some Christmas projects I designed for Canadian Scrapbooker.
First up....here are 3 cards I created for the Winter issue 2012 using Bo Bunny's Mistletoe collection.
Love these bright cute papers!
Aside from some lace and pom pom ribbon, I didn't do much else except cut the papers. Their adorable Christmas images are perfect for simple cards.
On December 11, I had a blog post over at Canadian Scrapbooker about a Christmas card I made with Stampin' Up! products.
Here is the card....
Click HERE to visit the Canadian Scrapbooker blog post with the details and photos of how I made my card.
Right now there is a HUGE contest over at Canadian Scrapbooker called "12 Days of Giving". Every day you can enter to win a prize package from a different sponsor! Click HERE to check it out.
I designed two Christmas projects for this contest, using Fancy Pants "Home for Christmas" and My Little Shoebox "Winter Wonderland".
I made Christmas crackers with the Fancy Pants papers for Day 3 of the contest....
They are super simple to make....
Cut an empty paper towel roll in half. Measure and cut your patterned paper to fit around it.
Put SookWang double sided adhesive tape (1/4") at top and bottom edges of the paper. Put a second strip of adhesive tape under the top strip (this will hold the tissue paper in place).
Remove the backing from the second piece of tape along the top.Cut a wider piece of tissue paper that extends about 4 inches past each side of the paper/roll.
Centre the tissue paper edge on that exposed adhesive strip.
Now remove the remaining top and bottom adhesive strips and wrap paper with tissue around your empty roll.
Almost done....just tie one end with twine, fill with prizes and goodies, tie the other end and decorate the top!
For my second project on Day 4 of 12 Days of Giving, I designed an Advent Garland using My Little Shoebox "Winter Wonderland" collection.
Each pocket is basically a rectangular piece of patterned paper, folded in two places for the body and the top envelope part.
One of the pieces of MLS papers had all of the numbers 1 - 25, which I cut out and adhered to the front of the pocket envelopes. I added stickers from their sticker sheet to decorate them a bit more.
On the back side of the pocket envelopes, I put small doilies (cut with the same Stampin' Up doily die I used for the tree "Joy" card). In the centre of each doily I put an alphabet letter sticker, so the entire banner in reverse spells "Have a Merry Christmas!"
In the pockets I put chocolate gold coins....but I think my teenagers would prefer the real thing!
It's not too late to win a prize package over at Canadian Scrapbooker! Stop by there and check out all the fabulous projects made by the rest of the Design Team using all of the papers and products from contest sponsors! Click HERE and enter to win yourself a Christmas present.
I'd like to wish all of you a very Merry Christmas! May you be blessed with a peaceful and joyous holiday season :)
I thought I would share some Christmas projects I designed for Canadian Scrapbooker.
First up....here are 3 cards I created for the Winter issue 2012 using Bo Bunny's Mistletoe collection.
| I added Robin's Nest Dew Drops as ornaments on this tree. |
On December 11, I had a blog post over at Canadian Scrapbooker about a Christmas card I made with Stampin' Up! products.
Here is the card....
| The tree is made with folded doilies cut with a Stampin Up Sizzix die. |
Right now there is a HUGE contest over at Canadian Scrapbooker called "12 Days of Giving". Every day you can enter to win a prize package from a different sponsor! Click HERE to check it out.
I designed two Christmas projects for this contest, using Fancy Pants "Home for Christmas" and My Little Shoebox "Winter Wonderland".
I made Christmas crackers with the Fancy Pants papers for Day 3 of the contest....
They are super simple to make....
Put SookWang double sided adhesive tape (1/4") at top and bottom edges of the paper. Put a second strip of adhesive tape under the top strip (this will hold the tissue paper in place).
Remove the backing from the second piece of tape along the top.Cut a wider piece of tissue paper that extends about 4 inches past each side of the paper/roll.
Centre the tissue paper edge on that exposed adhesive strip.
Now remove the remaining top and bottom adhesive strips and wrap paper with tissue around your empty roll.
Almost done....just tie one end with twine, fill with prizes and goodies, tie the other end and decorate the top!
For my second project on Day 4 of 12 Days of Giving, I designed an Advent Garland using My Little Shoebox "Winter Wonderland" collection.
![]() |
| I bought the pretty iridescent silver garland at Canadian Tire, and I found the clothespins in Hobby Lobby in the States. |
One of the pieces of MLS papers had all of the numbers 1 - 25, which I cut out and adhered to the front of the pocket envelopes. I added stickers from their sticker sheet to decorate them a bit more.
On the back side of the pocket envelopes, I put small doilies (cut with the same Stampin' Up doily die I used for the tree "Joy" card). In the centre of each doily I put an alphabet letter sticker, so the entire banner in reverse spells "Have a Merry Christmas!"
In the pockets I put chocolate gold coins....but I think my teenagers would prefer the real thing!
It's not too late to win a prize package over at Canadian Scrapbooker! Stop by there and check out all the fabulous projects made by the rest of the Design Team using all of the papers and products from contest sponsors! Click HERE and enter to win yourself a Christmas present.
I'd like to wish all of you a very Merry Christmas! May you be blessed with a peaceful and joyous holiday season :)
Subscribe to:
Posts (Atom)