Are you busy planning and making your Christmas cards? To be honest, I only create a handful for a few special people and actually snail mail about 80 more store-bought ones with our family photo and annual Christmas letter. Yes, I have a big family!
Here is one card I designed using some wonderful Sizzix products:
This is being featured on the Canadian Scrapbooker blog today, so for more details and some step-out photos of how it came together, click HERE and find out more.
Showing posts with label embossing folder. Show all posts
Wednesday, November 20, 2013
Wednesday, November 13, 2013
A Winter Scene
I love being on the Scrapbook Adhesives by 3L Design Team. I have the opportunity to work with a huge variety of manufacturers' product and, of course, the best adhesives around. With the new release of 3D Foam Designer Shapes, I've been having fun creating projects and here is a card featuring three of the shapes: a 3D Frame, Star and some Trees.
There are lots of ways to alter the foam shapes, and I used glitter and embossing powder.
There is a step-by-step photo tutorial on how I designed this card on the Crafty Power Blog, so click HERE to stop by there and check it out.
Scrapbook Adhesives by 3L also has a brand new website… it looks awesome! Click HERE to head over there. Thanks for stopping by.
There are lots of ways to alter the foam shapes, and I used glitter and embossing powder.
There is a step-by-step photo tutorial on how I designed this card on the Crafty Power Blog, so click HERE to stop by there and check it out.
Scrapbook Adhesives by 3L also has a brand new website… it looks awesome! Click HERE to head over there. Thanks for stopping by.
Monday, May 27, 2013
A Card and a Class
Once in awhile, I do a blog post for Canadian Scrapbooker called "Tuesday With the Team."
Last week, I shared a card I designed using Sizzix dies and embossing folders with Core'dinations ColorCore card stock.
There are more close-ups and a video tutorial on how I made this card on the Canadian Scrapbooker blog.
Click HERE to see that post and watch the video.
I also have some exciting news about a class I am teaching on June 13 at Treasured Memories. There are limited spots, so register now if you are interested.
I have had such wonderful feedback about a similar Kaisercraft photo display that I designed a few weeks ago, that I decided to make it into a class. Click HERE to see my other Photo Display project.
If some of you are wondering where I will be teaching in the future, I wanted to let you know that I will now be an independent instructor. So I will have classes at a variety of stores and events, which I will announce here on my blog and on Facebook.
I have lots of class ideas and opportunities coming up, so stay tuned.....
Last week, I shared a card I designed using Sizzix dies and embossing folders with Core'dinations ColorCore card stock.
There are more close-ups and a video tutorial on how I made this card on the Canadian Scrapbooker blog.
Click HERE to see that post and watch the video.
I also have some exciting news about a class I am teaching on June 13 at Treasured Memories. There are limited spots, so register now if you are interested.
I have had such wonderful feedback about a similar Kaisercraft photo display that I designed a few weeks ago, that I decided to make it into a class. Click HERE to see my other Photo Display project.
If some of you are wondering where I will be teaching in the future, I wanted to let you know that I will now be an independent instructor. So I will have classes at a variety of stores and events, which I will announce here on my blog and on Facebook.
I have lots of class ideas and opportunities coming up, so stay tuned.....
Wednesday, November 28, 2012
Graphic 45 Nutcracker Sweet Christmas Cards
I don't design very many card classes, but last year when I began teaching at The Urban Scrapbook, my first class was Christmas cards, using Graphic 45's "Christmas Emporium" collection. Click HERE to see the blog post about those cards.
Before their 2012 collections were released, I already knew there was a good chance I would be working on G45 cards again this time of year. When I saw "Nutcracker Sweet" I swooned. Those lovely ballerinas.....so elegant and beautiful!
Well, the whole ballet theme took hold in my brain and I came up with 5 cards, 4 of them featuring ballerinas!
Here are some close-ups and details about each card...
"The Nutcracker"
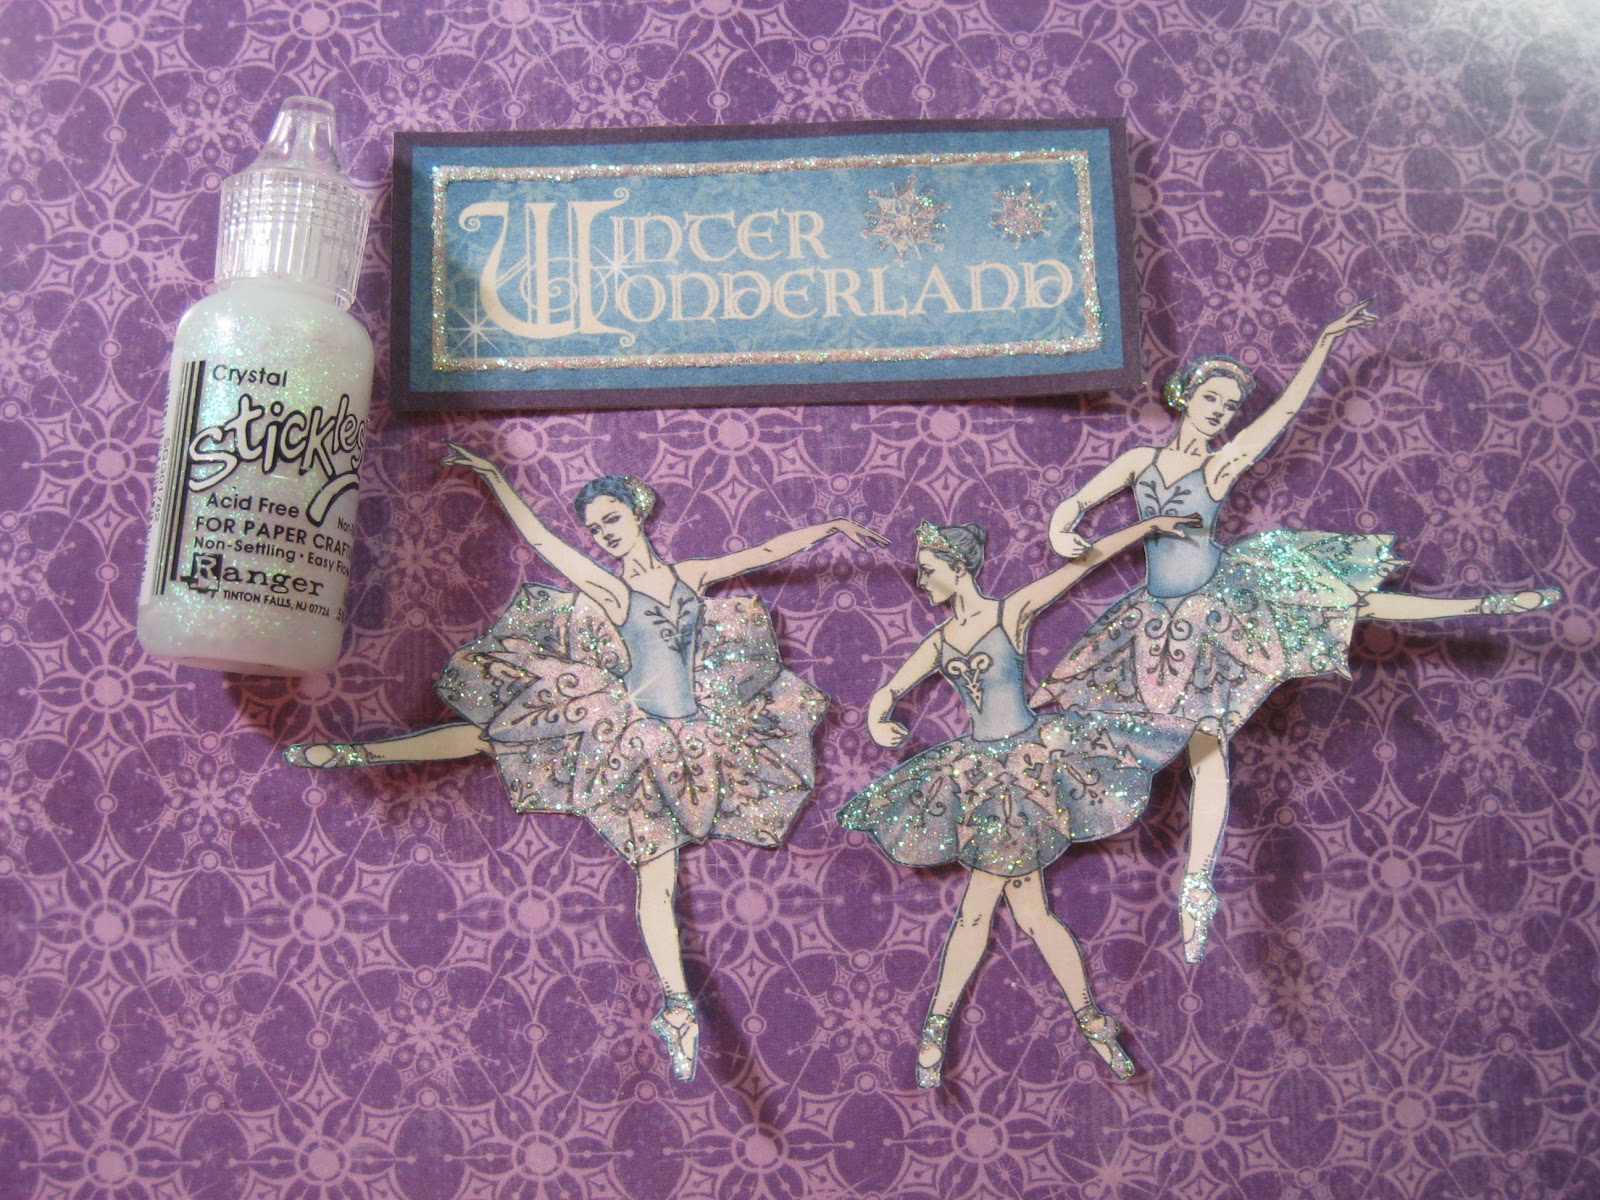
"Winter Wonderland"
Diamond Stickles came in handy for adding sparkle to the blue ballerinas...
Yes, I know this card does not reflect reality and our ballerinas here in Canada do not dance in the snow like this! [But I do wish our snowflakes were purple!]
"Sugar Plum Fairy"
I cut the mini music sheets from the "Enchanted Journey" patterned paper.
Here is how I created those glittery edges...
"Clara and the Mouse King"
To make the little vintage storybook, I cut apart the small book pages from the "Enchanted Journey" paper, misted them with water, crumpled, uncrumpled and then let dry.
The top pages of this book are actually cut out together as one piece, then folded in the centre so it appears to look more like a book.
I also misted Clara and the mini book with Perfect Pearls "Biscotti" spray to give them a pretty glimmer.
"The Blue Ballerina"
The doily in the background is also misted with Biscotti Perfect Pearls spray. Plus, I added clear Stickles to her headband, skirt and shoes.
Actually, this blue ballerina card could also serve as a birthday card for a little girl (or a big girl!)
So tell me, which card is your favourite? I'm having a hard time picking mine!
Hope you enjoyed looking at my Graphic 45 Christmas cards....I really enjoyed designing them :)
Before their 2012 collections were released, I already knew there was a good chance I would be working on G45 cards again this time of year. When I saw "Nutcracker Sweet" I swooned. Those lovely ballerinas.....so elegant and beautiful!
Well, the whole ballet theme took hold in my brain and I came up with 5 cards, 4 of them featuring ballerinas!
Here are some close-ups and details about each card...
"The Nutcracker"
| Yeah, he looks a little too serious to be nestled in white and pink chiffon. ha ha! |
![]() |
| Using my craft knife and ruler, I cut a window into the front of the card. |
| I adhered the embossed green paper inside. |
| I cut out the Nutcracker and adhered him inside so his head would appear in the window. |
![]() |
| Using this Martha Stewart branch punch, I created some greenery below the window. |
![]() |
| I coloured seam binding with Fired Brick Distress Stain, crumpled and let dry. Then tied a bow and adhered with liquid glue. |
| The background is Bazzill "Pansy" purple card stock stamped with snowflakes, then glittered with "Lavender" glitter using Ranger's new Sticky Embossing powder. |
| This is the first time I used this Sticky Embossing powder and it's awesome! But you have to work fast because it cools quickly and then loses its stickiness. |
| I cut this American Crafts glitter paper to look like snowy hills. |
Diamond Stickles came in handy for adding sparkle to the blue ballerinas...
| I also added stickles to the Winter Wonderland tag |
| These dancers are popped up onto foam squares. |
"Sugar Plum Fairy"
I cut the mini music sheets from the "Enchanted Journey" patterned paper.
![]() |
| The edges are sparkling with chunky clear glitter |
![]() |
| Add Glossy Accents or other clear drying adhesive along the edges of the mini music sheets. |
![]() |
| Pour chunky glitter over the wet Glossy Accents. Let dry for about half an hour. |
I fussy cut the Sugar Plum Fairy and adhered her with foam squares, then added Clear Diamond Stickles to her wings and shoes.
![]() |
| Pink tulle is threaded through 2 punched holes in the bottom corners and tied in a bow. |
"Clara and the Mouse King"
![]() |
| All images are cut from the "Holiday Magic" patterned paper. |
To make the little vintage storybook, I cut apart the small book pages from the "Enchanted Journey" paper, misted them with water, crumpled, uncrumpled and then let dry.
![]() |
| [Why oh why does Blogger insist on rotating my photos???] |
![]() |
| After inking the edges with brown chalk ink, I layered the mini book pages using Sookwang adhesive tape. |
| I punched lacy borders along the bottom with a Martha Stewart edge punch. |
"The Blue Ballerina"
| I used a scalloped edge punch around a piece of glitter card stock, then attached tulle to it before adhering the blue ballerina. |
Actually, this blue ballerina card could also serve as a birthday card for a little girl (or a big girl!)
So tell me, which card is your favourite? I'm having a hard time picking mine!
Hope you enjoyed looking at my Graphic 45 Christmas cards....I really enjoyed designing them :)
Wednesday, October 31, 2012
Graphic 45 Happy Haunting Mini Album
I have waited awhile to post this Halloween Mini album on my blog after teaching it at the Canadian Scrapbooker Carnival in September and then another version of it at The Urban Scrapbook last weekend. A big thank you and shout out to Graphic 45 for sponsoring my class at the Carnival! Everyone really enjoyed making the album.
Lots of photos coming up...so grab your pillowcase filled with candy, munch away...and enjoy :)
The bats are cut from Clearly For Art black modeling film, using a Sizzix die. When you heat the bats with a heat gun, you can curve their plastic wings.
Now let's look inside...
Each page is made from a 6" x 12" piece of black cardstock folded in half into a pocket. The pages alternate pockets opening at the top and at the side in the album. A big thanks to Michelle who advised me how to make these pages! Click HERE to visit Michelle's blog, where you will find more fabulous mini albums! One of my favourites is her travel mini album designed with Graphic 45 Tropical Travelogue.
The clock is also a Sizzix die and the corner webs were stamped with an Inkadinkado set called "All Hallow's Eve" (and embossed with Clearsnap)
The black manila tag is stamped with more Graphic 45 stamps, pumpkin and vine border. Then I used Clearsnap Donna Salazar Mixed Media Inx in "Leather" to achieve this copper effect.
I used Black Soot Distressed card stock and embossed it with a Sizzix wood grain Tim Holtz folder. Then I sanded it and lightly inked with brown.
The door knobs are Graphic 45 brads glued onto grunge board pieces that are painted with metallic Gold Adirondack dabber by Ranger. I clipped the corners of the grungeboard piece with a hole punch and inked a little with black.
The fence is a pocket, and this page is a side pocket that holds 2 tags.
This beautiful black cat is another Graphic 45 stamp. Did you know that this Happy Haunting Halloween collection has THREE amazing stamps sets? Beautiful images and all rubber cling mount!
I cannot wait to fill up this album with photos of Halloween....I was able to snap pics of all 3 teenagers before they left for school this morning in their costumes.
BabyOfTheFamily is a 1950's Diner Waitress...
And BoyGenius...uh oh. Please don't judge me as a mother for his politically incorrect costume [or send me hate mail].
Happy Halloween!
Lots of photos coming up...so grab your pillowcase filled with candy, munch away...and enjoy :)
![]() |
| The full moon is embossed with a Tim Holtz Sizzix folder and then lightly inked with Vintage Photo Distress ink. |
![]() |
| The cheesecloth fabric clouds are coloured with Black Soot Distress Ink (you can also use Stain) |
Now let's look inside...
![]() |
| I cut the stars with a Sizzix die and also embossed them. The Oct. 31 is a Graphic 45 stamp. |
| This pocket insert has a fussy cut moon tab. |
![]() |
| Pages 2 and 3 |
![]() |
| Page 2 has a slide out pocket as well. |
![]() |
| A paper pieced pumpkin I designed using Bazzill cardstock in Raven and Marigold |
![]() | |
| Space for photo and journaling |
![]() |
| Page 3 side pocket has this clock pull-out |
![]() |
| Pages 4 and 5 |
| The clock is on a paper hinge and flips up. |
| The page 5 pocket has a tag with stamping on it. |
![]() |
| The reverse side also has Graphic 45 stamping. |
![]() | |
| Pages 6 and 7 |
The spider web is cut with my Cricut from the Teresa Collins Halloween cartridge "Chic & Scary"
| The web flap lifts for more photos. |
![]() | |
| The doors open with paper hinges. |
The door knobs are Graphic 45 brads glued onto grunge board pieces that are painted with metallic Gold Adirondack dabber by Ranger. I clipped the corners of the grungeboard piece with a hole punch and inked a little with black.
![]() |
| Page 8 and the inside back cover |
![]() | |
| The tags are tied with black ribbon and black tulle. |
![]() |
| I cut some words from one of the patterned papers to add to both tags. |
| The crescent moon is cut freehand and then embossed in a Sizzix folder and lightly inked. |
I cannot wait to fill up this album with photos of Halloween....I was able to snap pics of all 3 teenagers before they left for school this morning in their costumes.
BabyOfTheFamily is a 1950's Diner Waitress...
| Serving up a bloody finger hot dog... |
DramaQueen is Annie....well, a more "grown up" version of Annie
![]() |
| She spent ALOT of time curling her hair |
![]() |
| Oh look. It's Bob Marley. [eek] |
Labels:
Bazzill,
Canadian Scrapbooker magazine,
Clearsnap,
Cricut,
Distress Ink,
embossing folder,
embossing powder,
Graphic 45,
Halloween,
mini album,
Paper Piecing,
Sizzix,
tag,
Tim Holtz,
Urban Scrapbook
Subscribe to:
Posts (Atom)