Showing posts with label winter. Show all posts

Tuesday, December 10, 2013

Nordic Pines from Bazzill Basics Paper

I have come across a winter collection that I really love…. Nordic Pines by Bazzill Basics Paper… and was inspired to design a layout for Canadian Scrapbooker's December Sketchy Challenge.
BabyOfTheFamily and her sweet friend surprised me by asking for photos outside during a blizzard! What?  I don't have to beg? Ha. 

Here is Sue Sykes' wonderful sketch:
I sure don't like winter, but strangely I always enjoy creating winter layouts! I think I was also inspired by the amazing landscape at the scrapbook retreat where I was working on this layout.
Isn't the Nordic Pines colour palette awesome? 

The Bazzill package of paper snowflakes worked perfectly as embellishments, along with the Kraft "Edge" card stock strips:
There were 3 different snowflake shapes:
I outlined the title with my American Crafts white Galaxy marker to make it stand out more on this cool piece of chalkboard patterned paper and added some stitching with red embroidery thread.
 My Stampin' Up! paper piercing set helped with all my stitching:
I also did some cross-stitching to enhance the homespun patterns and the tiny cross-stitched stag heads:
I stamped and cut out this stag using a Sizzix stamp/die set.
I just love that Bazzill pleated paper ribbon!  Just pull it out of the package, and you have a really pretty embellishment.  Easy!

At this busy time of year, it's so nice to use a collection that helps your layouts come together quickly and easily.  

If you need some inspiration with your designs, click HERE to visit the Canadian Scrapbooker Sketchy Gallery.

Wednesday, November 13, 2013

A Winter Scene

I love being on the Scrapbook Adhesives by 3L Design Team.  I have the opportunity to work with a huge variety of manufacturers' product and, of course, the best adhesives around.  With the new release of 3D Foam Designer Shapes, I've been having fun creating projects and here is a card featuring three of the shapes:  a 3D Frame, Star and some Trees.
There are lots of ways to alter the foam shapes, and I used glitter and embossing powder.

There is a step-by-step photo tutorial on how I designed this card on the Crafty Power Blog, so click HERE to stop by there and check it out.

Scrapbook Adhesives by 3L also has a brand new website… it looks awesome! Click HERE to head over there. Thanks for stopping by.

Tuesday, January 15, 2013

Winter Wishes from Echo Park

This year, Urban Scrapbook is going to create monthly kits with paper collections that correlate with a calendar theme.  So, January's kit is featuring the cutest collection from Echo Park called "Winter Wishes."

To get my scrappy brain in gear after our 2-week Christmas break, I turned to a PageMap sketch, from November 2012.
I was also inspired by Tracey Gregory's layout from this month's ScrapThat! kit club that has cut out circles in the design.  You can click HERE to visit Tracey's blog and see her wonderful layout.

Here is what I came up with...
There are a couple of ski hills right here in our city, and we sometimes go to the smallest one for some serious sledding action.  I took this photo of BabyOfTheFamily during on of our trips to the hill.  Sad to say, most of my sledding pics did not turn out great that day.

The kit includes this awesome sticker sheet, along with patterned papers, Bazzill card stock, ribbons, bling, glitter paper, vellum snowflakes....


A close up of the vellum snowflakes, cut with the new Tim Holtz die...
Here is a closer look at the cut-out circle windows...

I designed a winter scene with the stickers to create a title element...
I thought I'd share how I designed those circle windows..
My 'old school' Coluzzle....to cut out the circles.


Scrapbook Adhesives 3L 'Crafty Foam Tape' works really well to lift the entire piece.

Square pieces of Winter Wishes patterned paper.

The white paper with circles is placed on top.

A closer look at the circle windows
Then I just took my sticker sheet and went crazy adding sticker elements to each circle.

Prima Crystals are also in the kit...which I added to each circle window scene.

This January kit is now on sale at The Urban Scrapbook, so drop in or shop online to pick one up.

You can click HERE to visit the Urban blog where all the staff January layouts are on display.


Monday, December 3, 2012

December Sketchy Challenge

Winter might not be my favourite season, but I do love designing winter layouts! 

Here is the December sketch by Sue Sykes for the Canadian Scrapbooker Sketchy Challenge...
You can also participate in the Sketchy Challenge on Sue's blog HERE

And here is my layout, featuring Bo Bunny's "Snow Day" collection and photos of BabyOfThe Family playing outside about 8 years ago...
"Let it Snow" 
Now it seems the kids hardly ever go outside in the winter, unless it's to ski or to shovel (begrudgingly). 

I loved going to the park with my children in winter, where we would toboggan, make snow angels and forts.  I miss those rosy cheeks and lips and snowy good times!

Actually, BoyGenius and a huge group of friends went tobogganing one Friday night not too long ago.  I thought "Yay! He's 17 and still plays outside!"  Until his friends' neighbours called the cops because they were being too loud.  Sigh.  

For my layout, I used my Big Shot and a fantastic Spellbinders die set, as well as a Tim Holtz Sizzix die,  the new accordion snowflake....
This die set of snowflakes is AWESOME! 
I used the Sizzix die for my title, and added a little sparkle with American Crafts Wow! Glitter...


Harmonie Mosaic Tiles are glued along the edges of the title...

I punched holes and threaded May Arts ribbon along the top of my large banner background...
The ribbon is also tied into a bow on my journaling tag...
I think this Bo Bunny collection has a wonderfully unique colour palette....the surprising yellow and green look awesome with the teal, blue and cream.

I don't think I've ever made a winter page with a green background, but I'm glad I did!  

I hope you're going to play along with this month's Sketchy Challenge!  Click HERE to visit the gallery for lots of inspiration!

Hope you're enjoying the snow a little in your part of the world :)


Wednesday, November 28, 2012

Graphic 45 Nutcracker Sweet Christmas Cards

I don't design very many card classes, but last year when I began teaching at The Urban Scrapbook, my first class was Christmas cards, using Graphic 45's "Christmas Emporium" collection.  Click HERE to see the blog post about those cards.

Before their 2012 collections were released, I already knew there was a good chance I would be working on G45 cards again this time of year.  When I saw "Nutcracker Sweet" I swooned.  Those lovely ballerinas.....so elegant and beautiful!

Well, the whole ballet theme took hold in my brain and I came up with 5 cards, 4 of them featuring ballerinas!
Here are some close-ups and details about each card...

"The Nutcracker" 
Yeah, he looks a little too serious to be nestled in white and pink chiffon. ha ha!


The base of this card is Tim Holtz Black Kraft Core Coredinations, which I embossed with the Sizzix wood grain embossing folder. I also embossed the green polka dot piece for the card's interior with the Christmas words folder.

Using my craft knife and ruler, I cut a window into the front of the card.
I adhered the embossed green paper inside.

I cut out the Nutcracker and adhered him inside so his head would appear in the window.

Using this Martha Stewart branch punch, I created some greenery below the window.


I coloured seam binding with Fired Brick Distress Stain, crumpled and let dry.  Then tied a bow and adhered with liquid glue.

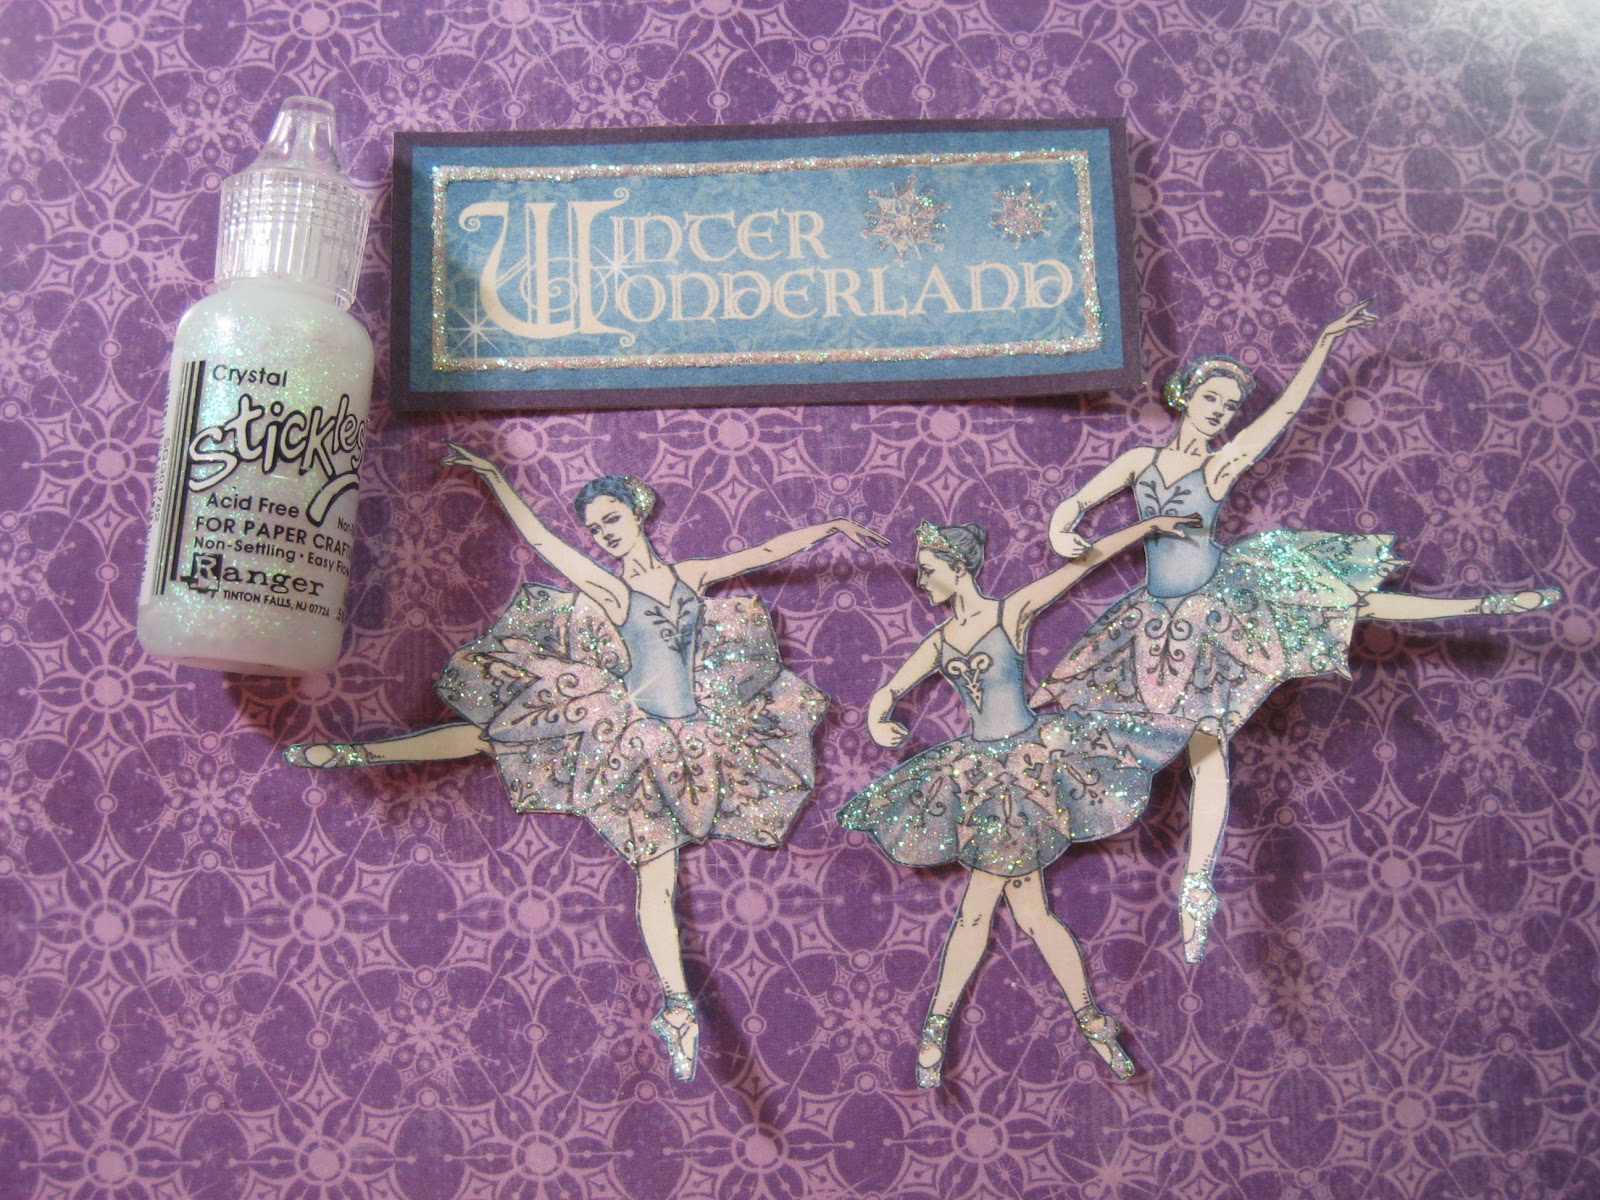
 "Winter Wonderland"


The background is Bazzill "Pansy" purple card stock stamped with snowflakes, then glittered with "Lavender" glitter using Ranger's new Sticky Embossing powder.

This is the first time I used this Sticky Embossing powder and it's awesome!  But you  have to work fast because it cools quickly and then loses its stickiness.
I cut this American Crafts glitter paper to look like snowy hills.

Diamond Stickles came in handy for adding sparkle to the blue ballerinas...
I also added stickles to the Winter Wonderland tag

These dancers are popped up onto foam squares.
Yes, I know this card does not reflect reality and our ballerinas here in Canada do not dance in the snow like this! [But I do wish our snowflakes were purple!]

"Sugar Plum Fairy"

I cut the mini music sheets from the "Enchanted Journey" patterned paper.
The edges are sparkling with chunky clear glitter
 Here is how I created those glittery edges...

Add Glossy Accents or other clear drying adhesive along the edges of the mini music sheets.
Pour chunky glitter over the wet Glossy Accents.  Let dry for about half an hour.

I fussy cut the Sugar Plum Fairy and adhered her with foam squares, then added Clear Diamond Stickles to her wings and shoes.
Pink tulle is threaded through 2 punched holes in the bottom corners and tied in a bow.
 
"Clara and the Mouse King"

All images are cut from the "Holiday Magic" patterned paper.

To make the little vintage storybook, I cut apart the small book pages from the "Enchanted Journey" paper, misted them with water, crumpled, uncrumpled and then let dry. 

[Why oh why does Blogger insist on rotating my photos???]
After inking the edges with brown chalk ink, I layered the mini book pages using Sookwang adhesive tape.
 The top pages of this book are actually cut out together as one piece, then folded in the centre so it appears to look more like a book. 
I punched lacy borders along the bottom with a Martha Stewart edge punch.
I also misted Clara and the mini book with Perfect Pearls "Biscotti" spray to give them a pretty glimmer.

"The Blue Ballerina"

I used a scalloped edge punch around a piece of glitter card stock, then attached tulle to it before adhering the blue ballerina.   
The doily in the background is also misted with Biscotti Perfect Pearls spray. Plus, I added clear Stickles to her headband, skirt and shoes.  

Actually, this blue ballerina card could also serve as a birthday card for a little girl (or a big girl!)

 So tell me, which card is your favourite? I'm having a hard time picking mine! 

Hope you enjoyed looking at my Graphic 45 Christmas cards....I really enjoyed designing them :)