Showing posts with label tulle. Show all posts

Wednesday, November 28, 2012

Graphic 45 Nutcracker Sweet Christmas Cards

I don't design very many card classes, but last year when I began teaching at The Urban Scrapbook, my first class was Christmas cards, using Graphic 45's "Christmas Emporium" collection.  Click HERE to see the blog post about those cards.

Before their 2012 collections were released, I already knew there was a good chance I would be working on G45 cards again this time of year.  When I saw "Nutcracker Sweet" I swooned.  Those lovely ballerinas.....so elegant and beautiful!

Well, the whole ballet theme took hold in my brain and I came up with 5 cards, 4 of them featuring ballerinas!
Here are some close-ups and details about each card...

"The Nutcracker" 
Yeah, he looks a little too serious to be nestled in white and pink chiffon. ha ha!


The base of this card is Tim Holtz Black Kraft Core Coredinations, which I embossed with the Sizzix wood grain embossing folder. I also embossed the green polka dot piece for the card's interior with the Christmas words folder.

Using my craft knife and ruler, I cut a window into the front of the card.
I adhered the embossed green paper inside.

I cut out the Nutcracker and adhered him inside so his head would appear in the window.

Using this Martha Stewart branch punch, I created some greenery below the window.


I coloured seam binding with Fired Brick Distress Stain, crumpled and let dry.  Then tied a bow and adhered with liquid glue.

 "Winter Wonderland"


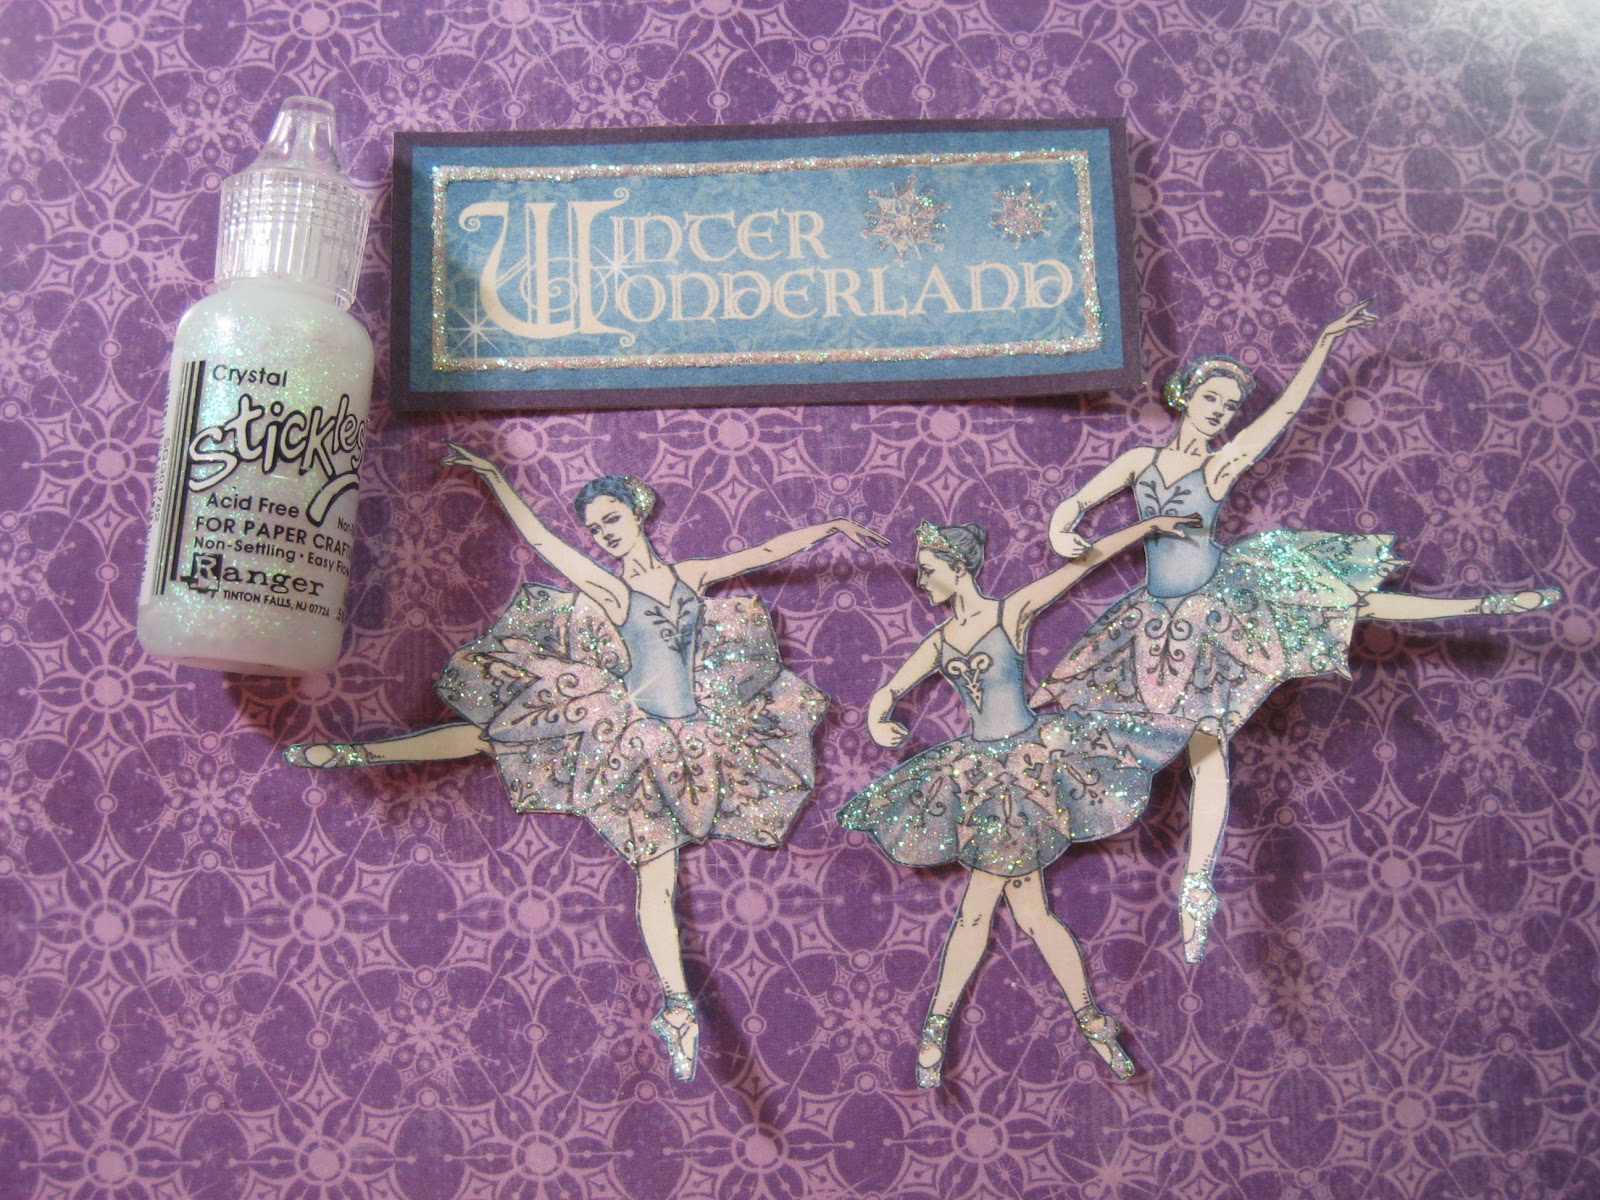
The background is Bazzill "Pansy" purple card stock stamped with snowflakes, then glittered with "Lavender" glitter using Ranger's new Sticky Embossing powder.

This is the first time I used this Sticky Embossing powder and it's awesome!  But you  have to work fast because it cools quickly and then loses its stickiness.
I cut this American Crafts glitter paper to look like snowy hills.

Diamond Stickles came in handy for adding sparkle to the blue ballerinas...
I also added stickles to the Winter Wonderland tag

These dancers are popped up onto foam squares.
Yes, I know this card does not reflect reality and our ballerinas here in Canada do not dance in the snow like this! [But I do wish our snowflakes were purple!]

"Sugar Plum Fairy"

I cut the mini music sheets from the "Enchanted Journey" patterned paper.
The edges are sparkling with chunky clear glitter
 Here is how I created those glittery edges...

Add Glossy Accents or other clear drying adhesive along the edges of the mini music sheets.
Pour chunky glitter over the wet Glossy Accents.  Let dry for about half an hour.

I fussy cut the Sugar Plum Fairy and adhered her with foam squares, then added Clear Diamond Stickles to her wings and shoes.
Pink tulle is threaded through 2 punched holes in the bottom corners and tied in a bow.
 
"Clara and the Mouse King"

All images are cut from the "Holiday Magic" patterned paper.

To make the little vintage storybook, I cut apart the small book pages from the "Enchanted Journey" paper, misted them with water, crumpled, uncrumpled and then let dry. 

[Why oh why does Blogger insist on rotating my photos???]
After inking the edges with brown chalk ink, I layered the mini book pages using Sookwang adhesive tape.
 The top pages of this book are actually cut out together as one piece, then folded in the centre so it appears to look more like a book. 
I punched lacy borders along the bottom with a Martha Stewart edge punch.
I also misted Clara and the mini book with Perfect Pearls "Biscotti" spray to give them a pretty glimmer.

"The Blue Ballerina"

I used a scalloped edge punch around a piece of glitter card stock, then attached tulle to it before adhering the blue ballerina.   
The doily in the background is also misted with Biscotti Perfect Pearls spray. Plus, I added clear Stickles to her headband, skirt and shoes.  

Actually, this blue ballerina card could also serve as a birthday card for a little girl (or a big girl!)

 So tell me, which card is your favourite? I'm having a hard time picking mine! 

Hope you enjoyed looking at my Graphic 45 Christmas cards....I really enjoyed designing them :)


Monday, April 23, 2012

Baby....It's Graphic 45 again!

I think most of us fell in love with the Graphic 45 "Little Darlings" collection when it was released this spring.  All of those cherubic sweet faces...I could almost smell the baby powder and freshly bathed skin :)  A far cry from my sweaty hormonal teenagers!!


Of course, I had to design with these papers the minute I saw them...and so I created this double page layout, simply called "Baby", featuring my adorable DramaQueen, age 3 months.

The background is 2 pieces of G45's ABC Primer paper called "One Two Buckle your Shoe". 

Here are some close ups....some lovely fussy cut elements...
A cream eyelet curtain is over the window....

A war time technique....using the curtain fabric to make a skirt! lol.

This was a class I taught at Urban Scrapbook last month, and thanks to Lynette's advice, I offered it as either Boy or Girl.....and here is the Boy version (but with the same girl photos!)

I changed up the pink gingham paper with blue paper and switched the girl image cut outs with boy versions....the sleeping boy in the lattice window and the bugle boy at far right.  I also inked the block pieces with blue instead of pink.
The little heart is cut from "Beach" Bazzill cardstock using a Sizzix Embosslit die from Stampin Up.

Blue Bugle Boy beside blocks that are inked blue....yes, a stereotype, I know.
Most of you know how to make those spiral roses, but if not, I'll explain how on the Canadian Scrapbooker blog next week (Tuesday With The Team on May 1, 2012).


Here is a close up of the Little Darlings banner...lots of fussy cutting involved.
The butterflies are cut from the G45 patterned paper called "Heaven Sent."


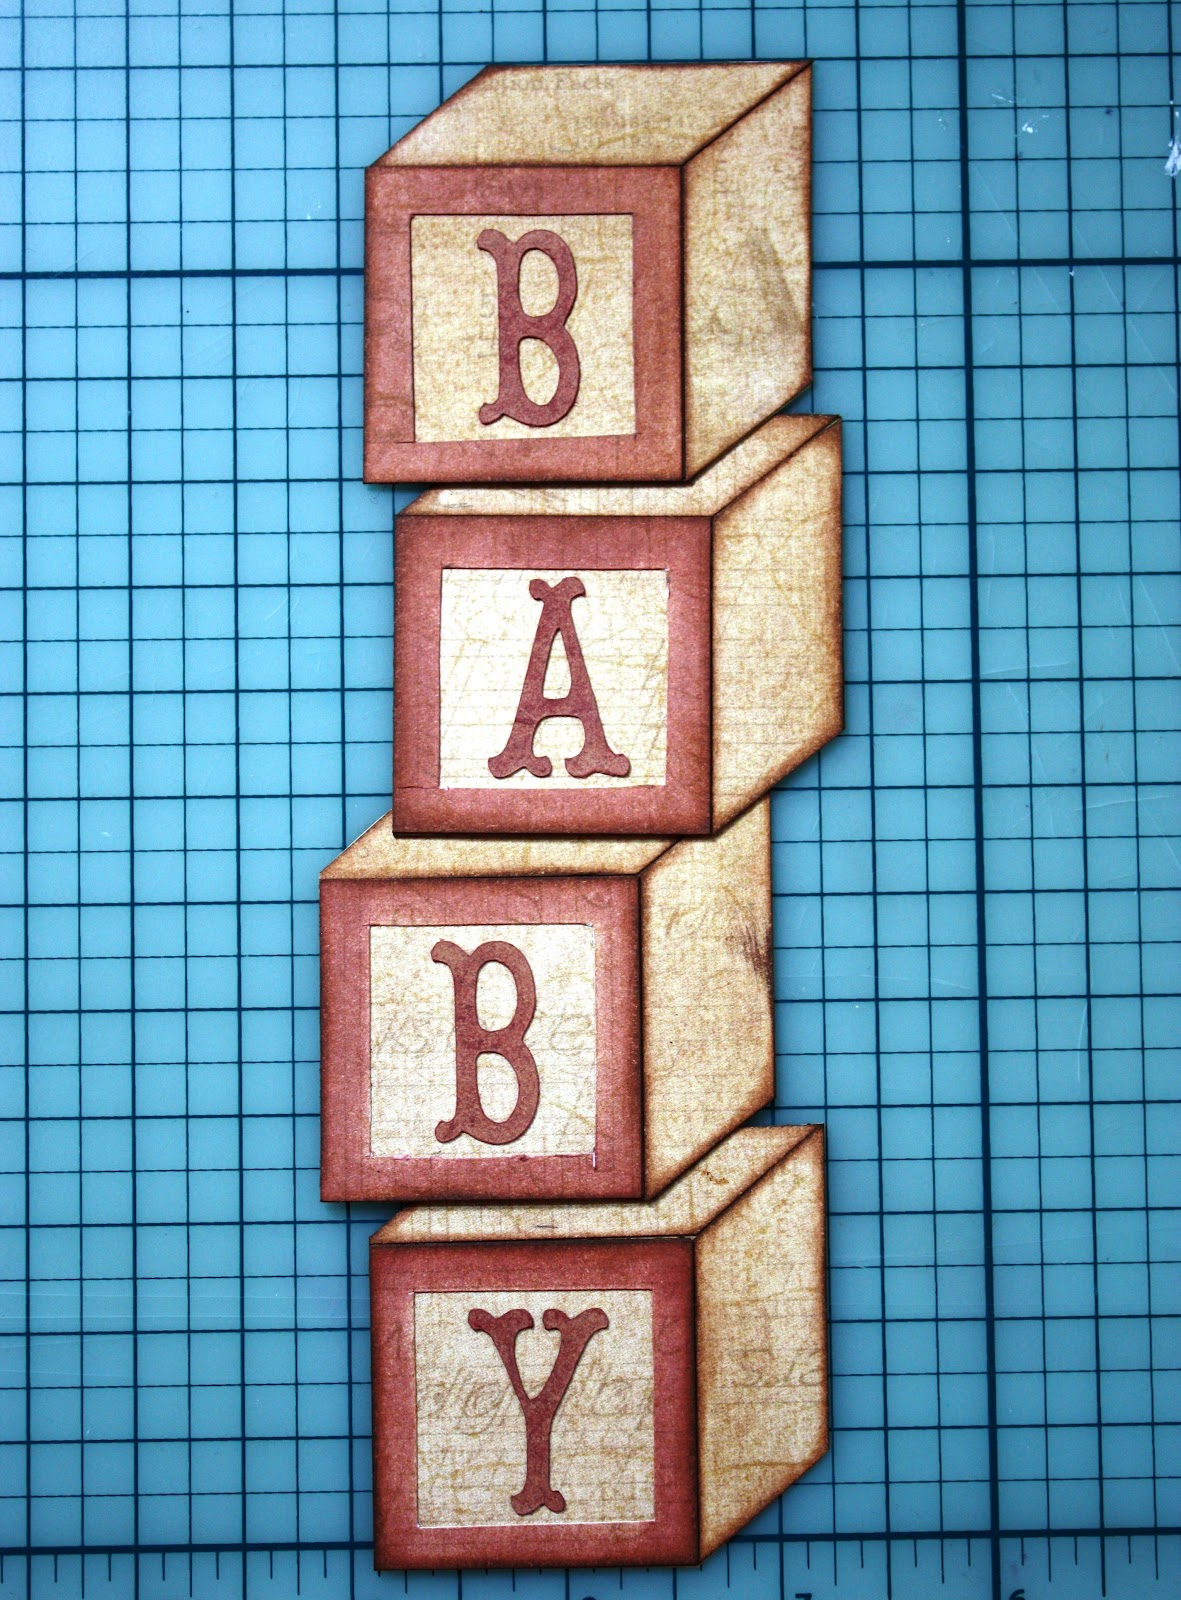
The two elements that I designed as special techniques are the lattice window and the baby blocks title.  

I saw the lattice window first on a card over at Scrapbook.com....in Peggy's gallery.  She is an expert card maker and you can visit her blog HERE.

To make the window frame, cut into a 5x7" piece of chipboard, leaving a 1/2" frame around. Then I covered one side of the frame with my tape runner adhesive and wrapped a wide cream satin ribbon around and around the frame...taking care with the corners...
You actually don't have to bother covering the top of the frame with the ribbon because it is hidden under the curtain.
The finished ribbon wrapped window frame
For the lattice I cut 1/4" strips of cream cardstock and lay them on the yucky side of the ribbon frame.  TIP:  Adhere the longest strip (diagonal corner to corner) first.  Then you can adhere the other strips parallel and do the same crossing over them and weaving over and under the other way.
This will be the back of your ribbon frame...just decide which side you like least and adhere the strips to that side.


Lucky for me, my talented scrappy friend Michelle posted a wonderful tutorial on her blog about how to make a lattice card, which will give me an excuse NOT to type up a detailed explanation.  Instead, you can visit her blog and lattice tutorial HERE.   
Michelle's lovely series of lattice window cards


As well, Michelle used this same "Little Darlings" collection to make the most adorable mini album and storage tin...you can check it out with another awesome tutorial HERE.  Thanks Michelle! 
Michelle's Little Darlings accordion mini album

And the altered tin that holds the album
 Now back to the next technique on my layout. 

 The baby blocks are my favourite element on this layout....and are made by an easy paper piecing technique.

I started by sketching a block....I wanted a vintage baby block (the kind I used to play with...and yes, I know I described them as "vintage"). 
A peek into my private sketch book :)
 From this sketch I made a tracer for 4 pieces: top, side and  2 front square blocks (which measure 1.5" each side)
I used a Prima medium brown chalk ink along these paper piece edges.


Take one of the 1.5" square blocks and ink edges with pink or blue to make the front frame.
With a 1" square template,  trace a square for cutting out in the centre of your inked block.
Tracing is finished and the frame will measure 1/4" when complete....so use your craft knife...
...and your metal ruler to cut out the centre, leaving you with a pink block frame.

Now you have an inked frame to adhere to the top of your plain block front.
Adhere all your pieces together like a puzzle to a piece of kraft cardstock, or the patterned paper you made the blocks from, and cut around.
I cut the "BABY" alphabet letters with my Cricut, Storybook Cartridge, from the same patterned paper, and inked them.
Then I played with my blocks....I staggered them...
....and I stacked them!  Actually, I LOVE them stacked, but this didn't work with my layout design :(


You can try using kraft cardstock for the blocks, but I preferred the appearance of the patterned paper, which is actually from Graphic 45's "ABC Primer" collection, last fall, and the paper is called "Happy Go Lucky." 

A couple of other cute page elements are the tulle bow toppers and the Cricut journalling spot....
I fooled around with my Lacy Labels cartridge until I found the journalling spot that was just right...a scalloped oval.

This cartridge is fantastic....each label has a delicate top layer, which I cut out of pink Little Darlings paper (and blue for boy)
An oops on my behalf....I forgot to write in the journaling spot until after I took the photos.  It does say "Serena Jade, Age 3 months, March 1997."


The tulle bows running across the top of the layout are a pretty element that involves colouring white tulle with Distress Ink.  I experimented with the Distress Ink when I couldn't find the right colour of tulle to match the layout papers.
I dragged the Wild Honey Distress Ink pad across the length of tulle (about a yard)
Use a cloth to wipe the excess ink off the tulle...a lot will come off, but the tulle will still be coloured. TIP:  Do not use paper towel to wipe off the excess ink...there will be bits of paper towel stuck inside the fibres of the tulle (experience talking here)
Then you can spend about 3 hours trying to tie two bows into the ends of a foot long length of tulle.  Torture.
Am I making this tulle topper technique sound appealing?  Oh, and let's not leave out the yellow/orange hands you'll be left with...
Yikes.  Makes me look like a heavy smoker who has eaten a couple bags of Cheezies!!!

You might be seeing a few more layouts in the near future featuring DQ....because lately she expressed her displeasure about how many pages I make for BabyOfTheFamily and not her.  

This means you might also be reading a blog post about sibling rivalry in the near future as well :)

Now it's time for me to slip this layout into DQ's album....and fondly recall what a lovely baby she was, the easiest of the three by far :)