
Of course, I had to design with these papers the minute I saw them...and so I created this double page layout, simply called "Baby", featuring my adorable DramaQueen, age 3 months.
 |
| The background is 2 pieces of G45's ABC Primer paper called "One Two Buckle your Shoe". |
Here are some close ups....some lovely fussy cut elements...
 |
| A cream eyelet curtain is over the window.... |
 |
| A war time technique....using the curtain fabric to make a skirt! lol. |
This was a class I taught at Urban Scrapbook last month, and thanks to Lynette's advice, I offered it as either Boy or Girl.....and here is the Boy version (but with the same girl photos!)

I changed up the pink gingham paper with blue paper and switched the girl image cut outs with boy versions....the sleeping boy in the lattice window and the bugle boy at far right. I also inked the block pieces with blue instead of pink.
 |
| The little heart is cut from "Beach" Bazzill cardstock using a Sizzix Embosslit die from Stampin Up. |
 |
| Blue Bugle Boy beside blocks that are inked blue....yes, a stereotype, I know. |
Here is a close up of the Little Darlings banner...lots of fussy cutting involved.
 |
| The butterflies are cut from the G45 patterned paper called "Heaven Sent." |
The two elements that I designed as special techniques are the lattice window and the baby blocks title.
I saw the lattice window first on a card over at Scrapbook.com....in Peggy's gallery. She is an expert card maker and you can visit her blog HERE.
To make the window frame, cut into a 5x7" piece of chipboard, leaving a 1/2" frame around. Then I covered one side of the frame with my tape runner adhesive and wrapped a wide cream satin ribbon around and around the frame...taking care with the corners...
 |
| You actually don't have to bother covering the top of the frame with the ribbon because it is hidden under the curtain. |
 |
| The finished ribbon wrapped window frame |
 |
| This will be the back of your ribbon frame...just decide which side you like least and adhere the strips to that side. |
Lucky for me, my talented scrappy friend Michelle posted a wonderful tutorial on her blog about how to make a lattice card, which will give me an excuse NOT to type up a detailed explanation. Instead, you can visit her blog and lattice tutorial HERE.
 |
| Michelle's lovely series of lattice window cards |
As well, Michelle used this same "Little Darlings" collection to make the most adorable mini album and storage tin...you can check it out with another awesome tutorial HERE. Thanks Michelle!
 |
| Michelle's Little Darlings accordion mini album |
 |
| And the altered tin that holds the album |
The baby blocks are my favourite element on this layout....and are made by an easy paper piecing technique.
I started by sketching a block....I wanted a vintage baby block (the kind I used to play with...and yes, I know I described them as "vintage").
 | |
| A peek into my private sketch book :) |
 |
| I used a Prima medium brown chalk ink along these paper piece edges. |
 |
| Take one of the 1.5" square blocks and ink edges with pink or blue to make the front frame. |
 |
| With a 1" square template, trace a square for cutting out in the centre of your inked block. |
 |
| Tracing is finished and the frame will measure 1/4" when complete....so use your craft knife... |
 |
| ...and your metal ruler to cut out the centre, leaving you with a pink block frame. |
 |
| Now you have an inked frame to adhere to the top of your plain block front. |
 |
| Adhere all your pieces together like a puzzle to a piece of kraft cardstock, or the patterned paper you made the blocks from, and cut around. |
 |
| I cut the "BABY" alphabet letters with my Cricut, Storybook Cartridge, from the same patterned paper, and inked them. |
 |
| Then I played with my blocks....I staggered them... |
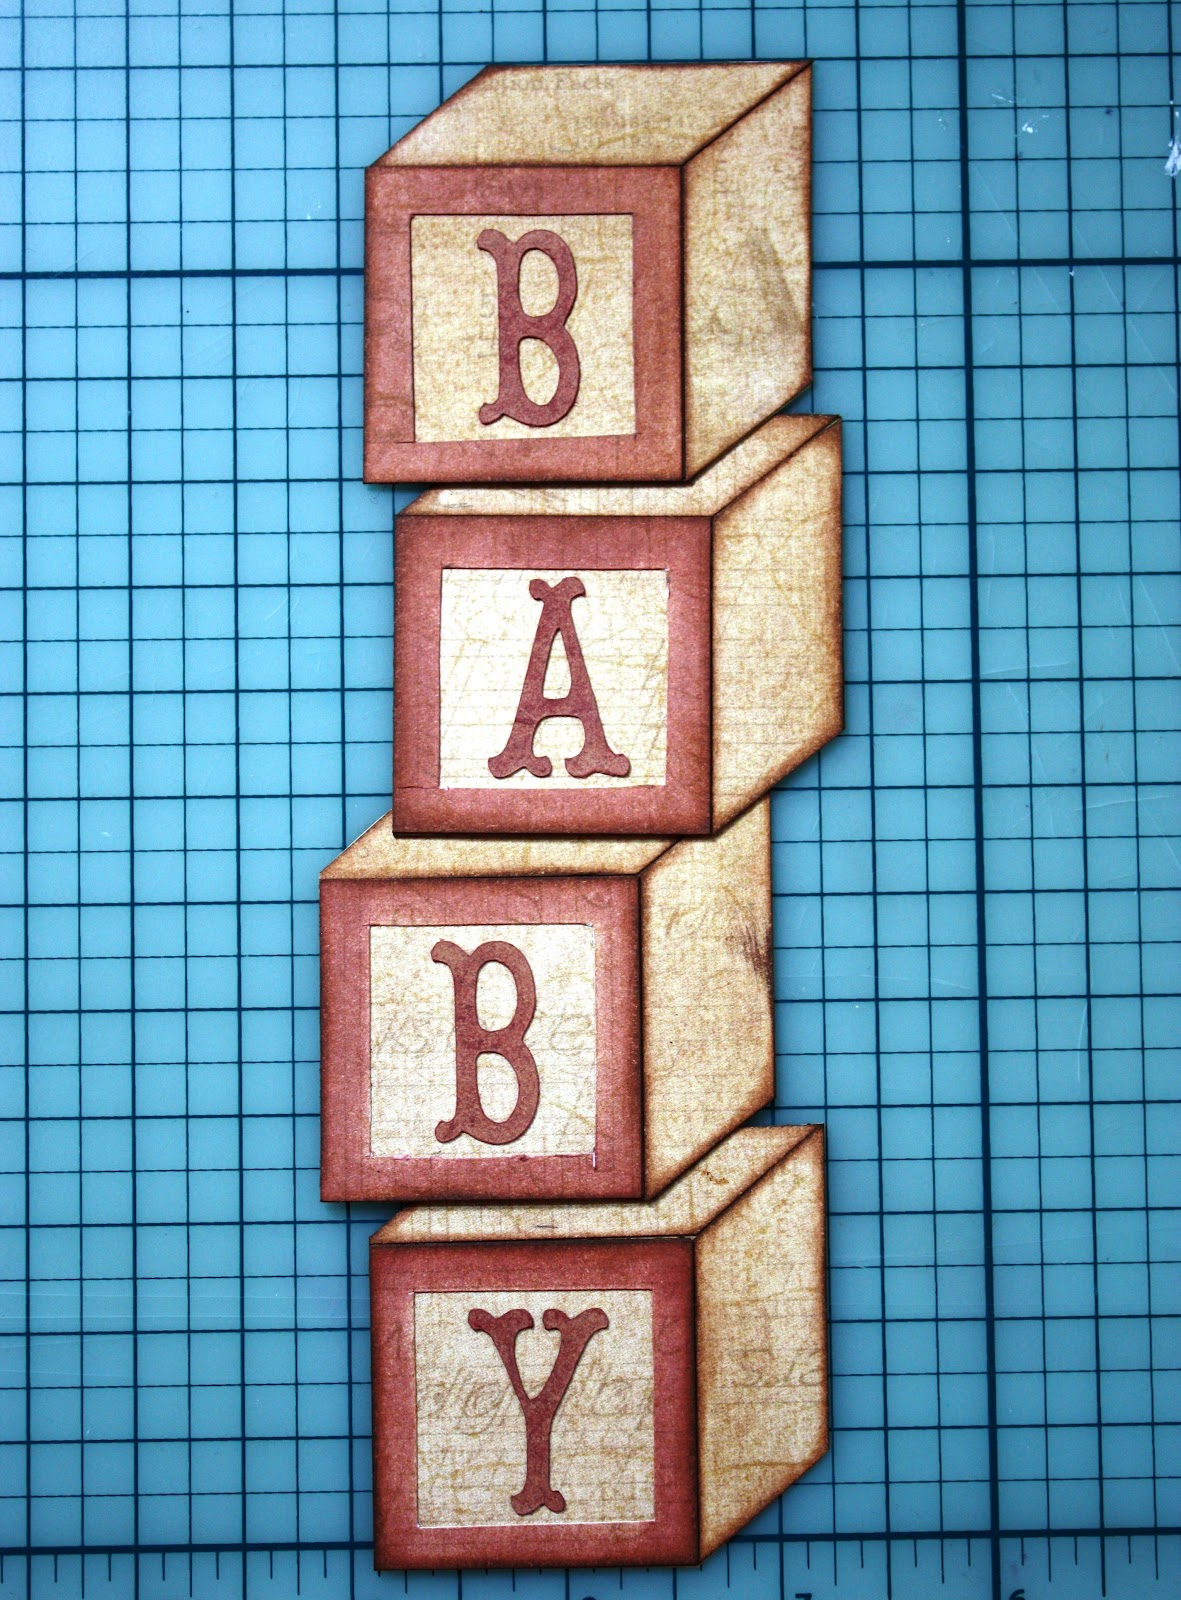 |
| ....and I stacked them! Actually, I LOVE them stacked, but this didn't work with my layout design :( |
You can try using kraft cardstock for the blocks, but I preferred the appearance of the patterned paper, which is actually from Graphic 45's "ABC Primer" collection, last fall, and the paper is called "Happy Go Lucky."
A couple of other cute page elements are the tulle bow toppers and the Cricut journalling spot....
 |
| I fooled around with my Lacy Labels cartridge until I found the journalling spot that was just right...a scalloped oval. |
 |
| This cartridge is fantastic....each label has a delicate top layer, which I cut out of pink Little Darlings paper (and blue for boy) |
The tulle bows running across the top of the layout are a pretty element that involves colouring white tulle with Distress Ink. I experimented with the Distress Ink when I couldn't find the right colour of tulle to match the layout papers.
 |
| I dragged the Wild Honey Distress Ink pad across the length of tulle (about a yard) |
 |
| Use a cloth to wipe the excess ink off the tulle...a lot will come off, but the tulle will still be coloured. TIP: Do not use paper towel to wipe off the excess ink...there will be bits of paper towel stuck inside the fibres of the tulle (experience talking here) |
 |
| Then you can spend about 3 hours trying to tie two bows into the ends of a foot long length of tulle. Torture. |
 |
| Yikes. Makes me look like a heavy smoker who has eaten a couple bags of Cheezies!!! |
You might be seeing a few more layouts in the near future featuring DQ....because lately she expressed her displeasure about how many pages I make for BabyOfTheFamily and not her.
This means you might also be reading a blog post about sibling rivalry in the near future as well :)
Now it's time for me to slip this layout into DQ's album....and fondly recall what a lovely baby she was, the easiest of the three by far :)


